Last updated: August 23, 2026
Fruit is the reason most people buy a dehydrator and the reason a lot of them end up disappointed. The first batch of apple rings comes out brown, the peaches stick to the tray, and a jar of dried mango goes sticky and then moldy two months later. None of that is the machine. It is three steps that get skipped: pretreatment, the dryness test, and conditioning.
This page is the fruit overview for the whole silo. It covers the pretreatment that stops browning, the heat that the extension services actually specify, how to tell when fruit is genuinely dry rather than merely warm, and what has to happen in the jar afterward. The individual fruits each get their own walkthrough, and they are linked where they come up.
This article contains affiliate links. If you buy through them, we may earn a commission at no extra cost to you. Learn more.
Quick Answer
How do you dehydrate fruit properly?
- Slice evenly, because uneven slices are the single biggest cause of a half done batch.
- Pretreat light colored fruit in an acidic solution so it does not brown.
- Penn State Extension gives 145 degrees F while surface moisture is present, dropping after one hour to 135 to 140 degrees F to finish.
- Fruit is dry when it is pliable and no beads of moisture appear when a piece is pressed between your fingers.
- Condition it in a jar for several days before it goes into long term storage.
Bottom line: even slices, an acid dip, the right finishing temperature and a conditioning week. Skip conditioning and the jar goes moldy months later.
Prep: Even Slices Beat Everything Else
A tray of slices ranging from thin to thick will never finish together. The thin pieces go hard and the thick ones stay damp, and you have to choose which failure you want. Consistent thickness is worth more to the finished batch than any feature on the machine.
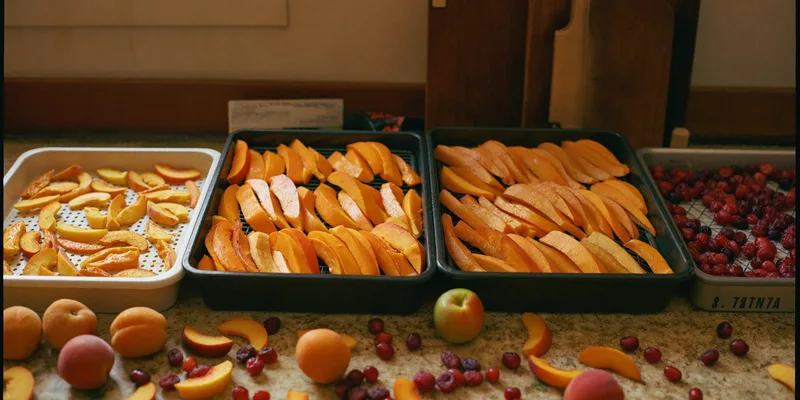
Use a knife you trust or a slicing tool you can set once, work in batches, and lay pieces in a single layer without overlapping. Skins can stay on for apples and peaches. Stone fruit halves dry much slower than slices, so cut them down unless you specifically want a chewy half.
Cut Side Up on the Tray
Fruit sheds moisture from the cut face, and a cut face pressed against a tray traps it. Lay slices flat with the wet side exposed and leave a gap between pieces so air can move around each one. A crowded tray is a slow tray.
Pretreatment: Stopping the Brown
Apples, pears, peaches and bananas oxidize and turn brown within minutes of being cut, and drying locks that color in. An acid dip prevents it. Penn State Extension gives an acidic solution of 3 and three quarter teaspoons of powdered ascorbic acid, or half a teaspoon of powdered citric acid, in 2 cups of water, with the fruit held in it for 10 minutes.
The same guidance notes that equal parts bottled lemon juice and water can be substituted, which is what most home kitchens actually use. Drain the pieces well before they go on the tray, because a wet slice adds an hour to the run. Darker fruit like cherries, blueberries and cranberries does not need this step.

Cranberries and Blueberries Need Checking, Not Dipping
Whole berries with a waxy skin resist drying because the skin is doing its job. The fix is checking, which means breaking that skin so moisture can escape: halve them, or dip them briefly in boiling water until the skins split. Left whole and unchecked, a tray of cranberries will still be soft after a full day.
Heat and Timing
Penn State Extension specifies starting at 145 degrees F when there is surface moisture on the fruit or vegetable, then reducing after one hour to 135 to 140 degrees F to finish drying. Montana State University Extension puts the optimum drying temperature for food at 140 degrees F, warning that higher temperatures cook the food instead of drying it, which raises the chance of molding later.
That warning describes case hardening. When the outside dries and seals while the middle is still wet, the piece feels done and is not, and the trapped moisture shows up as mold in the jar weeks later. Running hotter to save time is the most expensive shortcut in dehydrating.
Rotate the Trays Unless the Fan Is at the Back
Stacked machines with the fan in the base or lid dry the trays nearest the fan first, so you swap the stack partway through. Machines with a rear mounted fan blowing horizontally across the trays do not need this. If tray rotation annoys you, that is the feature to buy for, and our guide to vertical versus horizontal airflow explains the trade in detail.
Fruit by Fruit
Every fruit behaves a little differently, and the difference is mostly sugar and water content. High sugar fruit stays pliable and sticky, low sugar fruit goes crisp. The table below is the quick orientation, and the fruits with their own pages are linked underneath.
| Fruit | Prep | Pretreatment | Finished texture |
|---|---|---|---|
| Apples and pears | Cored, sliced into rings or wedges | Acid dip, browns fast without it | Pliable, leathery |
| Peaches and nectarines | Halved, pitted, then sliced | Acid dip | Pliable and slightly sticky |
| Mango and pineapple | Peeled, sliced to even thickness | Not needed | Chewy, stays flexible from the sugar |
| Cranberries and blueberries | Whole, skins checked or halved | Not needed | Wrinkled and firm, like a raisin |
Mango and Pineapple: The Sticky Ones
Both are high in sugar, which means they will never feel dry the way an apple ring does. They finish chewy and slightly tacky, and that is correct. The risk with sticky fruit is judging it by feel and pulling it early, so lean on the press test rather than on how it feels between your fingers.
Peaches: Skin On or Off
Skin on is faster and keeps the slice together. Skin off gives a softer, more uniform result and is what most people prefer for baking. Neither is wrong. If you leave the skin on, slice thinner, because the skin slows moisture leaving that face of the piece.
The Dryness Test and Conditioning
Penn State Extension describes fruit as ready when the pieces are pliable and no beads of moisture form when pressed between your fingers. Let a piece cool first, because warm fruit always feels softer than it is. Test two or three pieces from different trays rather than one from the top.
Then condition. Penn State Extension describes packing the cooled fruit loosely into an airtight glass or plastic container for several days so the remaining moisture distributes evenly. Shake the jar daily and look for condensation on the glass. If you see any, the batch goes back in the dehydrator. This step is what separates a jar that survives the winter from one that fuzzes over in November.
Pasteurizing Home Grown or Sun Dried Fruit
If the fruit came out of a garden or was dried outdoors, Penn State Extension gives two options for pasteurizing it: heating in the oven at 160 degrees F for 30 minutes, or chilling in the freezer at 0 degrees F or below for 48 hours. Do this before conditioning, not after.
Storage: Where Good Batches Die
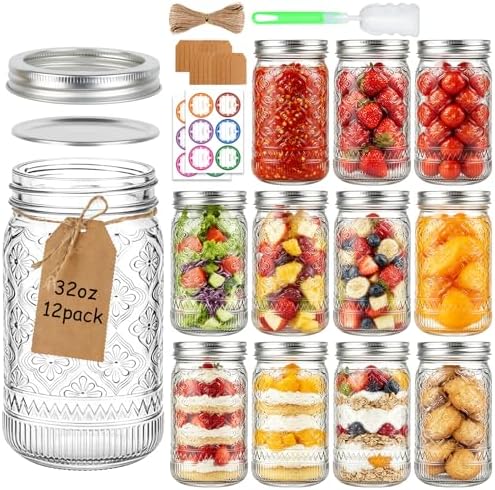
Dried fruit reabsorbs moisture from the air, and a jar opened daily on a warm counter is doing that constantly. Small jars beat one big jar, because you break the seal on less of the batch each time. Cool, dark and sealed is the whole rule.
For anything past a few months, pull the air out. A jar sealer attachment on a vacuum sealer, or mylar with an oxygen absorber for bulk, both extend the useful life considerably. Our guide to storing dehydrated food covers jars, absorbers and desiccants, and the mason jar vacuum sealer guide covers the attachment itself.
Frequently Asked Questions
What temperature should fruit be dehydrated at? Penn State Extension gives 145 degrees F while surface moisture is present, reducing after one hour to 135 to 140 degrees F to finish. Montana State University Extension puts the optimum drying temperature for food at 140 degrees F and warns that higher temperatures cook rather than dry.
Do I have to pretreat fruit before drying it? Only the light colored fruit that browns, which means apples, pears, peaches and bananas. Penn State Extension gives an ascorbic or citric acid solution for 10 minutes, or equal parts bottled lemon juice and water as a substitute.
Why did my dried fruit go moldy in the jar? Almost always because it was not fully dry or was not conditioned. Penn State Extension describes conditioning as packing the cooled fruit loosely in an airtight container for several days so remaining moisture evens out. Condensation in the jar means it goes back in the machine.
Can I dry fruit in the oven instead? You can, but most ovens will not hold a low enough temperature steadily, and the door has to stay ajar for moisture to leave. It works for a one off batch and it is a poor routine.
Why is my dried mango still sticky? Because it is high in sugar and that is the correct finished texture. Judge it by the press test rather than by stickiness: no beads of moisture when a cooled piece is squeezed.
Do I need to peel fruit before drying? No. Skin on is faster and holds slices together, skin off gives a softer result. Slice thinner if you leave the skin on, because it slows moisture leaving that side.
The Bottom Line
Slice evenly, dip the fruit that browns, finish at the temperature the extension guidance specifies rather than higher, test cooled pieces by pressing them, and condition the batch in a jar for several days before it goes into storage. That sequence is the whole craft. If you are still choosing a machine, our food dehydrator buying guide covers airflow and capacity, and the apple dehydrator guide is the best starting point for a first fruit batch.