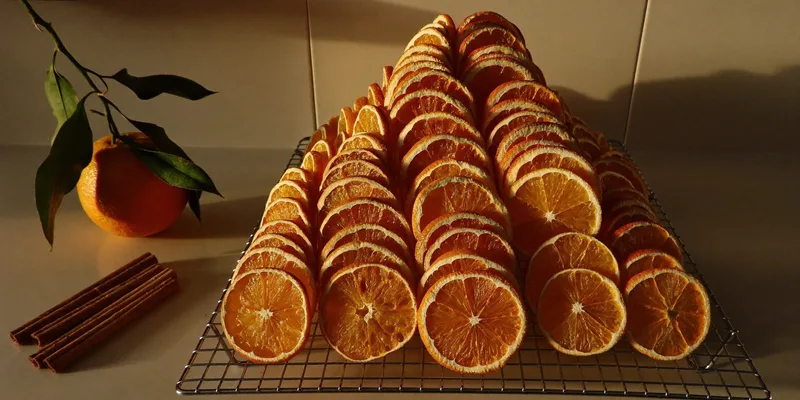
Last updated: August 23, 2026
Dried orange slices show up twice a year in most kitchens. In December they are garland, wreath filler and the thing hanging off the tree, and in January they are the cocktail garnish nobody wants to pay a fortune for. Both jobs want the same thing from the machine, and both fail in the same two ways: slices that curl into taco shapes, and slices that look dry and turn leathery in the box a week later.
Neither problem is about the dehydrator brand. It is slice thickness, tray choice and knowing when to stop. This guide covers cutting evenly, keeping the slices flat, how long the color holds, and how to store a batch so the ones you made in November are still good at Christmas.
This article contains affiliate links. If you buy through them, we may earn a commission at no extra cost to you. Learn more.
Quick Answer
How do you dehydrate orange slices?
- Slice crosswise, thin and even, and blot both faces dry before loading.
- Lay them flat in a single layer with no overlap, on a mesh liner if the slices are small.
- Penn State Extension gives 145 degrees F while surface moisture is present, dropping after one hour to 135 to 140 degrees F to finish.
- Decoration slices go until crisp all the way through; eating slices can come out pliable.
- Store them sealed and dark, because a cardboard box in a damp room softens them within days.
Bottom line: even thin slices, one layer, and dry them further than feels necessary if they are going on a wreath.
Cutting: The Step That Decides the Batch
Orange slices dry from the cut faces, and thickness controls everything downstream. Thick slices stay damp in the pith and go leathery. Very thin slices dry fast and beautifully but tear when you thread a string through them. Somewhere in the middle, cut consistently, is the target.
Cut crosswise through the equator so you get the wheel pattern, using a sharp knife and a steady hand, or a slicing tool set to one thickness. Whichever you use, the important thing is that every slice in the load is the same, because a tray of mixed thicknesses cannot finish together.
Blot Before They Go In
A freshly cut orange slice is wet on both faces, and that surface juice is pure sugar. Left on, it caramelizes and gives you brown patches, and it makes the slices stick to the tray. Press each slice between paper towels or a clean cloth before loading. It takes two minutes and it changes how the batch looks.
Trays, Liners and Keeping Them Flat
Citrus slices curl as they dry, because the peel shrinks at a different rate to the flesh. On an open tray they lift at the edges and end up cupped. There are two practical answers: use a mesh liner so there is nothing for the edge to hook on, or place a second tray directly above so the slices are gently confined.
Do not use a solid silicone sheet for this job. The slices need airflow on the underside, and a solid sheet keeps the bottom face wet long after the top is done, which is exactly how you get a slice that is crisp on one side and sticky on the other. Our guide to dehydrator trays and sheets covers which surface belongs on which job.

Space Them Out
Overlapping slices weld together and leave a pale wet ring where they touched. Leave a visible gap between each one. This is the point where people load one more tray than they should, and the whole run takes longer for it.
Heat and How Long It Takes
Penn State Extension specifies starting at 145 degrees F when there is surface moisture on the fruit or vegetable, then reducing after one hour to 135 to 140 degrees F to finish. Montana State University Extension gives the optimum drying temperature for food as 140 degrees F and warns that higher temperatures cook the food instead of drying it.
Total time depends on thickness, load size and how juicy the fruit was, so treat any number you read as a rough marker rather than a setting. What you can rely on is the check: pull a slice, let it cool, and look at the center of the pith rather than the peel. The peel dries first and lies to you.
Decoration Slices and Eating Slices Are Different
This is the distinction that solves most complaints. A slice destined for a garland has to be dried past the point that would be right for eating, because it will hang in a warm room for weeks and any moisture left in the pith will show up as a soft brown patch. A slice you plan to eat or drop in a drink can come out pliable.
Penn State Extension describes fruit as ready when it is pliable and no beads of moisture appear when a piece is pressed between your fingers. That is the eating standard. For decoration, keep going until the slice is stiff and makes a papery sound when you tap it.
| Use | Slice thickness | Dry until | How to store it |
|---|---|---|---|
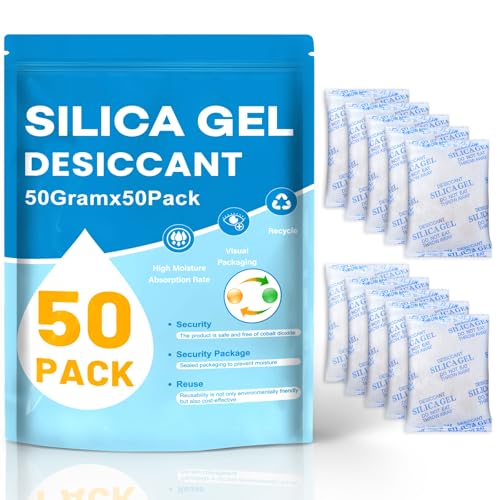
| Garland and wreaths | Medium, strong enough to thread | Stiff and papery all the way through | Sealed box or bag with a desiccant |
| Cocktail garnish | Thin, for a clean wheel | Crisp at the edge, no tacky center | Small sealed jar, out of the light |
| Snacking and tea | Medium | Pliable, no beads of moisture when pressed | Jar, conditioned first |
| Powdered zest | Peel only, no flesh | Brittle enough to snap | Airtight jar, grind as needed |
Color, Browning and the Oven Question
Some browning is normal, and heat is what drives it. Slices that come out amber rather than bright orange were run too hot, dried too long, or were cut from fruit that had already been sitting. Naval oranges tend to hold color better than very juicy juicing varieties, and blood oranges will always darken.
An oven can do this job, and a lot of people try it first because it needs nothing new. The problem is that most domestic ovens will not hold a temperature this low, so the door has to stay propped open, and the browning gets much harder to control. If you are doing one wreath a year, the oven is fine. If this is an annual production, our food dehydrator buying guide covers the capacity question, since garland eats trays faster than anything else you will dry.
Storing a Batch Until You Need It
Dried citrus reabsorbs moisture readily, and it does it fastest in exactly the conditions people store it in: a cardboard box in a basement, or a paper bag in a cupboard next to the kettle. Seal it. A jar or a zip bag with the air pressed out will hold a batch from November to December without drama.
For eating slices, condition them first. Penn State Extension describes packing cooled dried fruit loosely into an airtight glass or plastic container for several days so remaining moisture distributes evenly, which is the step that catches an underdried batch before it molds. Our guide to storing dehydrated food covers conditioning, desiccants and jar choice.
Frequently Asked Questions
What temperature do you dehydrate orange slices at? Penn State Extension gives 145 degrees F while surface moisture is present, dropping after one hour to 135 to 140 degrees F to finish. Montana State University Extension puts the optimum drying temperature for food at 140 degrees F and warns that hotter cooks rather than dries.
Why did my orange slices curl? The peel shrinks faster than the flesh. Use a mesh liner so the edges have nothing to hook on, or place a second tray directly above the slices to keep them gently flat.
Why are my dried orange slices sticky? Either they are not finished, or surface juice was left on before loading. Blot both faces before drying, and check the pith at the center rather than judging by the peel.
How long do dried orange slices last? Kept sealed, dark and genuinely dry they hold up for a season and more. Kept in a cardboard box in a damp room they soften in days, which is what most people are actually experiencing when they say theirs went bad.
Can I eat orange slices dried for decoration? If they were prepared as food and stored sealed, yes, though they will be very dry. Slices that have hung on a wreath in a dusty room for weeks are decorations, not food.
Should I use a mandoline or a knife? Either, as long as every slice in the load matches. Consistency across the tray matters far more than which tool produced it.
The Bottom Line
Slice thin and even, blot the faces, keep them flat on a mesh liner, and dry decoration slices well past the point that would be right for eating. Then seal them, because citrus pulls moisture back out of the air faster than almost anything else you will dry. For the machine itself, our food dehydrator buying guide covers tray count and airflow, and the fruit drying overview covers pretreatment and conditioning across the whole silo.