Last updated: August 23, 2026
Jerky is the one thing a dehydrator does where the machine’s weaknesses actually matter. Fruit that dries unevenly is an annoyance. Meat that dries unevenly, in a machine whose thermostat drifts, is a food safety question, and it is why the jerky crowd argues about airflow and temperature control the way other people argue about knives.
Five pounds of sliced meat also takes more tray space than almost anything else you will dry. A machine that handles a tray of apple rings without complaint can turn a hunting season’s worth of jerky into four separate overnight runs. This guide covers what to look for, and the heat step that comes before the dehydrator ever switches on.
This article contains affiliate links. If you buy through them, we may earn a commission at no extra cost to you. Learn more.
Quick Answer
What makes a dehydrator good for jerky?
- An adjustable thermostat that holds its setting, so you can follow USDA drying guidance.
- Horizontal airflow from a rear fan, which dries a full load of meat without tray rotation.
- Enough shelf area for five pounds of sliced meat at once, not in shifts.
- Trays that come apart and go in the dishwasher, because marinade gets everywhere.
Bottom line: a rear fan box machine with an accurate thermostat is the jerky answer; the heat step happens before or after drying either way.
The Heat Step That Comes First
USDA FSIS guidance for home made jerky is to heat meat to 160F, and poultry to 165F, measured with a food thermometer, before the meat goes into the dehydrator, and then to dry it in a dehydrator that maintains 130F to 140F throughout. That order is the safety backbone of the whole process.
The reason FSIS gives is that in a dehydrator most of the heat goes into evaporating moisture, so the meat itself stays cool until it is already dry, and pathogens can survive the drying stage. Steaming or roasting the strips to temperature first, or applying the same heat step after drying, is what closes that gap.
What this means when you shop
You need a machine whose temperature you can set and trust, and a food thermometer for the meat itself. A dial marked only low, medium and high cannot tell you whether the cabinet is holding a drying temperature, and a machine that overshoots will case harden the outside while the inside stays moist.
Airflow: Why Jerky People Buy Box Machines
A rear mounted fan pushes air horizontally across every shelf at once, so the strip at the back of the bottom shelf sees roughly what the strip at the front of the top shelf sees. Stackable machines push air vertically through a tray stack, and meat, which is dense and wet, blocks that flow far more than sliced apple does.
You can absolutely make good jerky in a stackable, and thousands of people do, by rotating trays partway through and loading lightly. If jerky is the main reason you are buying, the box machine removes that chore entirely, and the difference shows up most on a full load.
Best box machine for full jerky loads
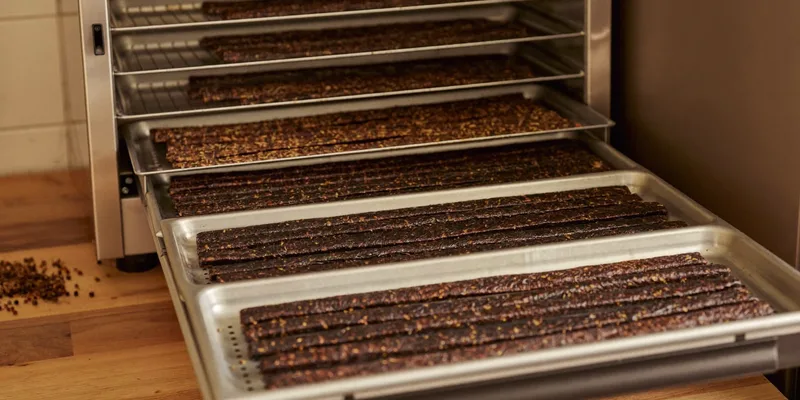
Nine square shelves with a full width rear fan is the format that made Excalibur the default among hunters and jerky makers. The shelves slide out for loading, and a full load dries without a rotation schedule.
Best stainless option for heavy seasonal use
Stainless shelf machines take marinade abuse better than plastic and give more usable area per shelf. The ten and eleven shelf models are built for the kind of volume a hunting season produces.

Tray Space: Count Pounds, Not Trays
Five pounds of meat sliced for jerky covers a surprising amount of shelf, because strips cannot overlap and need air on both faces. As a rough planning rule, expect a modest five tray machine to take a couple of pounds per run and a nine shelf box machine to take a full five pound batch comfortably.
Meat also shrinks hard, so a load that looks generous going in comes out as a fraction of the volume. That is what pushes people toward the larger cabinets after their first season, and why buying one size up is rarely regretted.
Best compact machine if you dry a few pounds at a time
A six shelf stainless machine with digital control handles a couple of pounds of jerky alongside everything else a kitchen dries, without taking over the counter permanently.

Best expandable stackable on a budget
The Nesco Snackmaster line remains the low cost entry, and additional trays let you grow the stack. Load lightly, rotate once, and it will do the job for occasional batches.

What to Compare Before You Buy
Four specifications decide whether a machine suits jerky. Everything else is convenience. Compare these across the models on your shortlist rather than reading feature lists in order.
| What to check | Why it matters for jerky | Good sign | Warning sign |
|---|---|---|---|
| Thermostat | You must hold the drying range USDA specifies | Numbered digital setting | Low, medium, high dial only |
| Airflow | Dense meat blocks vertical flow | Rear fan, horizontal shelves | Small fan in a stack lid |
| Shelf area | Strips cannot overlap | Square shelves, published area | Round trays with a center hole |
| Cleaning | Marinade drips onto everything | Removable dishwasher safe trays | Fixed mesh, sealed base |
Temperature guidance referenced here comes from USDA FSIS jerky guidance; machine details come from manufacturer listings.
Marinade, Drips and Cleanup
Marinated strips drip, and in a box machine they drip onto the shelf below and eventually onto the floor of the cabinet. Blot the strips before loading, use a solid liner sheet on the bottom shelf, and accept that a wipe down is part of every jerky run.
Ground meat jerky pressed from a jerky gun makes less mess but sticks harder, and mesh liners are what keep the strips from tearing when you lift them. Our tray and sheet guide covers which liner suits which job.
Slicing consistently
Uneven thickness is the most common reason one tray finishes hours before another. Partially freezing the meat before slicing makes an even cut far easier by hand, and cutting across the grain gives a jerky that breaks rather than pulls.
Frequently Asked Questions
Do I have to heat the meat before drying it? USDA FSIS guidance says to heat meat to 160F, or poultry to 165F, before drying, because a dehydrator alone may not raise the meat to a temperature that eliminates pathogens. The same heat step applied after drying is the alternative FSIS describes.
What temperature does the dehydrator itself need to hold? FSIS guidance calls for a dehydrator that maintains 130F to 140F throughout the drying process, with an adjustable temperature control. Verify with a separate thermometer if your machine has ever seemed optimistic.
How do I know jerky is done? It should bend and crack without snapping in half, and show no soft or shiny spots inside when you tear a cooled piece. Judge a piece after it has cooled, since warm jerky always feels more pliable.
Can I make jerky in a stackable dehydrator? Yes, with lighter loads and a tray rotation partway through. The limitation is evenness at full capacity, not the machine’s ability to dry meat.
Do I need curing salt? Commercial jerky seasoning kits include a cure packet and instructions for how much meat each packet treats. Follow those instructions exactly rather than estimating. Our jerky seasoning guide explains what is in the packet.
How should I store finished jerky? Cool it fully, then keep it in an airtight container out of the light. Vacuum sealing in jars or bags extends it further, and the refrigerator or freezer is the right home for anything you are keeping beyond the short term.
The Bottom Line
For jerky specifically, buy the accurate thermostat and the rear fan before you buy anything else, and size the cabinet for the season rather than the week. The safety half of the job happens outside the machine, in the heat step USDA FSIS describes, so a food thermometer belongs on the shopping list alongside the dehydrator. If you dry venison, our deer jerky guide covers the wild game specifics, and the full sequence is in the jerky time and temperature guide.