Last updated: August 23, 2026
Water bath canning looks intimidating from the outside and turns out to be one of the simplest kitchen processes there is: fill a jar, wipe the rim, put a lid on, and boil it for the time a tested recipe gives. The part that actually matters, and the part nobody should improvise, is which foods are allowed in that pot at all.
This guide runs the process from a cold stove to a sealed jar on the shelf, then covers the rules that keep it safe, the foods that are off limits, and the mistakes that show up in the same order every August. Nothing here replaces a tested recipe, and every number in this article is attributed to the source it comes from.
This article contains affiliate links. If you buy through them, we may earn a commission at no extra cost to you. Learn more.
Quick Answer
How does water bath canning work?
- Jars of high acid food go into a rack in a deep pot, fully covered by boiling water, for the exact time a tested recipe specifies.
- High acid only. The NCHFP restricts boiling water canning to fruit, jams and jellies, pickles, and properly acidified tomatoes.
- Low acid foods such as vegetables, meat, and soup must go in a pressure canner instead, no exceptions and no family shortcuts.
- Adjust for altitude using the chart in the recipe or in the USDA Complete Guide to Home Canning, because boiling temperature drops as you go up.
Bottom line: the method is easy, the food list is the safety rule, and a tested recipe supplies both the time and the altitude adjustment.
What Water Bath Canning Actually Does
Boiling water canning heats the contents of a sealed jar to the boiling point and holds it there long enough to destroy the molds, yeasts, and bacteria that spoil high acid food, while driving air out of the jar so a vacuum forms as it cools. That vacuum is the seal. It is a preservation method built around acidity doing half the work.
Acidity is the reason the method is limited. The NCHFP explains that Clostridium botulinum spores survive boiling temperatures and can grow in a sealed low acid jar, and that only the higher temperatures reached under pressure destroy them. Acid environments stop those spores from growing, which is why acidic foods can safely be processed in plain boiling water.
What You Can and Cannot Put in the Pot
The allowed list is short and worth memorizing: fruit and fruit juice, jams and jellies, pickles and relishes, chutneys, salsa made from a tested recipe, and tomatoes that have been acidified as the recipe directs. Everything on that list is naturally acidic or made acidic by added vinegar, lemon juice, or citric acid.
Off the list, without exception, are green beans, corn, carrots, potatoes, beets, plain squash, meat, poultry, fish, broth, and any soup or sauce that mixes those into a low acid whole. The NCHFP states these require pressure canning. Our article on what you cannot water bath can goes through the individual foods people most often get wrong.
Tomatoes Are the Common Trap
Tomatoes sit near the acidity line rather than safely above it, and modern varieties vary. The NCHFP directs that tomatoes be acidified with bottled lemon juice or citric acid before canning, in the amount the tested recipe gives per jar size, whether you use a boiling water canner or a pressure canner. Grandmother’s plain tomatoes with a pinch of salt are not the same product. Our guide to citric acid for canning covers the acidifying step.
The Process, Start to Finish
Set the canner on the stove with the rack in it, fill it about half with water, and start it heating while you prepare the food. Wash the jars in hot soapy water and keep them warm. Lids go on according to the lid manufacturer’s current instructions, which for most brands no longer involve simmering them.
Fill each jar with the prepared food, leaving the headspace the recipe specifies, since headspace is what allows the vacuum to form. Slide a bubble remover or a flat plastic tool down the inside of the jar to release trapped air, wipe the rim clean with a damp cloth, and set the lid on with the band tightened fingertip tight rather than cranked down.
Loading, Timing, and Cooling
Lower the jars onto the rack with a jar lifter, add boiling water until the tops are covered by at least one inch as the USDA Complete Guide to Home Canning directs, cover the pot, and bring it back to a full rolling boil. Start timing only when that boil returns, not when the jars go in. If the boil stops partway through, the USDA guide directs bringing it back to a boil and starting the timing over.
When time is up, turn off the heat, take the lid off, and let the jars sit a few minutes before lifting them out straight and setting them on a towel with space between them. The NCHFP says to let jars cool undisturbed for twelve to twenty four hours before checking seals, then remove the bands, label, and store.

Altitude Changes the Time, Not the Method
Water boils at a lower temperature as elevation rises, which means the same processing time delivers less heat in Denver than in Charleston. Every tested water bath recipe therefore comes with an altitude chart, and the USDA Complete Guide to Home Canning gives increased processing times for elevations above one thousand feet.
Look up your actual elevation once, write it on a card taped inside a cabinet door, and use it every season. Do not estimate, do not average with a neighboring town, and do not skip the adjustment because the jars sealed fine last year. Sealing is not the same as safe processing.
Gear That Makes the Difference
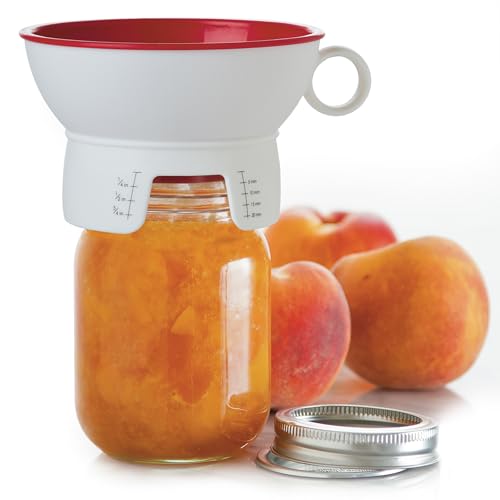
You need less than the kits suggest. A deep pot with a rack, a jar lifter, a wide mouth funnel, and a way to measure headspace will get any high acid recipe into a jar. The pot is the piece worth spending on, because depth and a stove appropriate bottom decide whether the day is pleasant or a wrestling match. Our water bath canner guide compares enameled, stainless, and stockpot setups.
The funnel and the headspace tool are the two cheap pieces that prevent failed seals, since food on the rim is the leading cause of a jar that will not seal and headspace is the measurement people guess at most often.

Water Bath, Steam, and Pressure Compared
| Method | Foods allowed | What supplies the heat | Main limitation |
|---|---|---|---|
| Boiling water canner | High acid only | Jars submerged in boiling water | Heavy pot, long heat up time |
| Atmospheric steam canner | High acid only | Steam around the jars at the same temperature | NCHFP limits it to short processing times |
| Pressure canner | High and low acid | Pressurized steam above boiling temperature | Learning curve, gauge upkeep |
| Oven or open kettle | None | Not a validated process | Called unsafe by the NCHFP |
The last row is not padding. Open kettle canning, where hot food is ladled into jars and left to seal without processing, and oven canning are both named as unsafe by the NCHFP, and both still circulate in old recipe cards.
Mistakes That Show Up Every Season
Starting the timer when the jars go in rather than when the water returns to a rolling boil is the most common process error. The second is skipping the altitude adjustment. The third is reusing single use metal lids, which the lid manufacturers themselves advise against.
The rest are handling errors. Overtightened bands trap air that needs to escape, a food smeared rim prevents the seal, and jars moved too early can fail hours later. If a jar has not sealed within twenty four hours, refrigerate it, or reprocess it with a new lid within the window a tested recipe allows.
When a Jar Loses Liquid
Liquid escaping during processing, known as siphoning, usually traces back to a boil that swung hard, jars pulled out too fast, or headspace that was too small. The food is still processed, but the exposed part can discolor. Our article on siphoning in canning covers the causes one by one.
Frequently Asked Questions
Do I have to sterilize jars before water bath canning? Only for short processes. The NCHFP states that jars processed for less than ten minutes must be pre sterilized, and that a longer process sterilizes the jars during canning. Our guide to sterilizing canning jars shows the method.
Can I water bath green beans if I add vinegar? Only if you are following a tested pickled bean recipe that specifies the vinegar amount and the processing time. Adding vinegar by eye to plain beans does not make them a tested acidified product, and the NCHFP directs that plain vegetables be pressure canned.
My jars did not seal. What now? Refrigerate and use them, or reprocess with a new lid within the time a tested recipe allows. Then check the usual causes: food on the rim, a nicked jar edge, a reused lid, or a band tightened so hard that air could not vent. Our jars that will not seal article works through it in order.
How long does water bath canned food keep? Store sealed jars in a cool, dark, dry place and use them within the timeframe your tested recipe source recommends. Quality declines with warmth and light long before a jar looks wrong, so a basement shelf beats the cabinet above the stove.
Can I stack jars in two layers? Only in a canner deep enough to keep an inch of water over the top layer, with a rack between the layers so jars do not sit on each other. Most standard canners are single layer pots.
Is a steam canner the same thing? Not quite. An atmospheric steam canner reaches the same temperature, but the NCHFP limits its use to naturally acidic or properly acidified foods with a processing time of forty five minutes or less. Our steam canner guide covers the rules.
The Bottom Line
Water bath canning is a short list of steps wrapped around one hard rule: high acid foods only, with tested times and an altitude adjustment. Get the pot, the rack, and the lifter right, follow a tested recipe as written, and the rest is repetition. Read next: which water bath canner fits your stove and, once you want beans and broth on the shelf, how to choose a pressure canner.