Last updated: August 23, 2026
Kombucha needs less equipment than almost any other ferment, which is why the kits vary so wildly. One box is a jar, a cloth and a rubber band. The next is a jar with a tap, a thermometer strip, test strips, bottles, a funnel and a brush. Both make kombucha. Only one of them makes it easy to keep making kombucha in week five, when the novelty has worn off and you just want to pour a glass.
This guide covers what a starter setup genuinely needs, where the money is worth spending, and the two decisions that shape everything else: batch brewing against continuous brewing, and whether you plan to bottle and carbonate.
This article contains affiliate links. If you buy through them, we may earn a commission at no extra cost to you. Learn more.
Quick Answer
What do you actually need in a kombucha brewing kit?
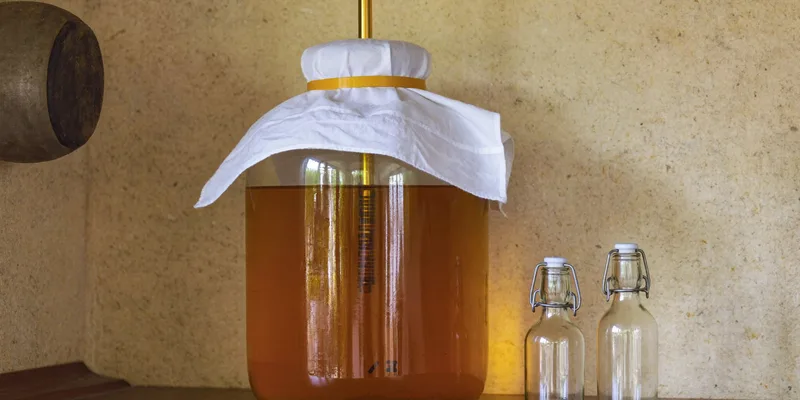
- A wide mouth glass vessel, ideally a gallon, plus a tight weave cloth cover and a band.
- A living culture with starter liquid, which is the one part that is not hardware.
- A spigot if you want continuous brewing, in a material that will not corrode in acid.
- Swing top bottles only if you plan a second fermentation for fizz.
Bottom line: glass, a breathable cover and a healthy culture are the kit. Everything else is convenience, in that order.
The Two Ways to Brew, and What Each Needs
Batch brewing means one jar, one batch: sweet tea goes in, kombucha comes out, you empty it and start again. Continuous brewing means a larger vessel with a tap near the bottom, where you draw off finished kombucha and top the vessel back up with fresh sweet tea, so the culture is never disturbed.
Batch brewing suits people who want control over each batch and do not mind the handling. Continuous brewing suits people who drink kombucha steadily, because pouring a glass from a tap is a two second job and the culture stays undisturbed under its own liquid. The vessel is the only real equipment difference.
The Vessel: Glass, and Nothing Clever
Finished kombucha is acidic, and that acidity is the reason the vessel matters. Clear glass is the standard because it does not react, does not scratch easily and lets you see the culture and the sediment without lifting anything. A wide mouth is important too, since you need to get a hand in to clean it.
Skip decorative crockery and unknown glazed pottery. Brewing guides consistently warn against unidentified ceramic glazes for exactly this reason: an acidic liquid sitting in a vessel for a week is not the place to guess about what is in the finish. Metal vessels are also out, aside from short contact with stainless.

If You Buy a Jar With a Tap
Check what the tap is made of and where it sits. Plastic spigots are common and work, stainless is easier to keep clean, and either way the tap should sit above the sediment layer that collects at the bottom or you will pour yeast strands into every glass. A tap that unscrews for cleaning beats a sealed one.
The Cover Is Not Optional and Cheesecloth Is Not It
Kombucha needs to breathe, so the vessel is covered with cloth rather than sealed. What you want is a tight weave fabric, held down firmly with a band, that lets air through and keeps insects out. Fruit flies find a kombucha jar within a day of a warm kitchen going quiet, and they are the most common reason a batch gets thrown out.
Cheesecloth is the classic mistake. The weave is open enough that small flies get through it, which defeats the purpose. Tight weave cotton or muslin covers sold for the job cost very little and last for years, and a coffee filter with a rubber band works in a pinch.

What Belongs in a Kit and What Does Not
Kits bundle a lot of small items, some genuinely useful and some filler. The table sorts them so you can read a listing quickly and see whether the price is going into the parts that matter.
| Item | Why it is there | Worth it? | Notes |
|---|---|---|---|
| Wide mouth glass vessel | The brew lives in it | Essential | Gallon is the standard household size |
| Tight weave cloth and band | Airflow without insects | Essential | Not cheesecloth |
| Culture and starter liquid | The actual ferment | Essential | Often shipped separately from hardware |
| Spigot | Continuous brewing | Worth it if you drink it steadily | Check the material and how it cleans |
| Adhesive temperature strip | Kitchen temperature drives the pace | Cheap and useful | Stick it on the outside of the jar |
| pH strips | Tracking acidity as it ferments | Useful once you care | Test strips are fine for a home brew |
| Swing top bottles | Second fermentation and fizz | Only if you carbonate | Pressure rated bottles, not repurposed jars |
Bottling, Fizz and Pressure
Carbonation happens in the second fermentation, when you bottle finished kombucha with a little sugar or fruit and seal it. That seal is the point: the carbon dioxide has nowhere to go, so it dissolves into the drink. It is also the risk, because a sealed bottle of an active ferment keeps building pressure until you stop it.
Use bottles built for pressure, keep them out of direct sun, move them to the refrigerator once they are fizzy enough to slow the fermentation down, and burp them if you are unsure. The same pressure logic applies to fermented hot sauce, and our guide to bottling fermented hot sauce goes through the failure modes in more detail.

Testing Acidity Without Guessing
Sourness tells you a lot, but taste alone is a rough instrument, especially when you are new and every batch tastes strong. pH strips are the cheap way to track where a batch is going, and a digital meter is the accurate way if you also ferment vegetables or make hot sauce.
Follow the pH targets in the recipe or guidance you are brewing to rather than a number you half remember, and calibrate a meter if you use one. Our guide to pH meters covers the models and the calibration routine, which is the part people skip.
Frequently Asked Questions
Do I need a spigot jar to start? No. A plain wide mouth gallon jar with a cloth cover brews kombucha perfectly well. The tap is a convenience that pays off if you switch to continuous brewing and drink it regularly.
Why do fruit flies keep getting into my brew? The cover is too open or not held down tightly. Cheesecloth in particular has a weave small flies get through. Use a tight weave cotton cover with a firm band, and wipe the outside of the jar, since sticky drips attract them.
Can I brew kombucha in a ceramic crock? Only if you know the glaze is food safe and lead free. Brewing guides warn against unknown or decorative glazes because the finished brew is acidic and sits in contact with the surface for days. Clear glass avoids the question.
How do I stop bottles from over carbonating? Refrigerate once the fizz is where you want it, since cold slows the fermentation right down. Use bottles designed to hold pressure, keep them out of sunlight and warm spots, and open one over a sink if a batch has been out longer than planned.
Do I need pH strips? They are cheap and they take the guesswork out of judging a batch by taste alone, which is worth it while you are learning. A digital meter makes sense if you also make hot sauce or ferment vegetables.
What about the stringy bits at the bottom of the jar? Yeast strands are normal in a healthy brew and collect at the bottom, which is why a tap should sit above that layer. Strain them out when you bottle if you would rather not drink them.
Is kombucha the same thing as fermented tea? Kombucha is fermented tea: sweetened tea fermented by a culture of bacteria and yeast, the SCOBY. Other fermented teas exist, pu-erh being the best known, but those are fermented leaves rather than a brewed drink you make at home. If a recipe says fermented tea and lists sugar and a SCOBY, it means kombucha, and the gear on this page is what it needs.
The Bottom Line
Buy glass, buy a tight weave cover, and put the rest of the money into a healthy culture. Add a tap if you drink kombucha steadily enough to want continuous brewing, and add pressure rated bottles only when you are ready to carbonate. Read next: fermentation jars for the vessel options, and fermentation kits if vegetables are next on your list.