Last updated: August 23, 2026
An apple peeler corer looks like a Victorian curiosity until the year somebody gives you three bushels. Then the little cast machine that spikes an apple on a fork and turns a crank becomes the difference between two evenings of work and one pleasant hour with the radio on.
They are also the tool people most often buy, use once and shove in a cupboard, usually because they bought the wrong mount or expected it to handle fruit it cannot. Getting those two decisions right is most of what there is to say about them.
This article contains affiliate links. If you buy through them, we may earn a commission at no extra cost to you. Learn more.
Quick Answer
What should you check before buying an apple peeler corer?
- Mount type. A clamp bites any counter edge. A suction base is faster to set up and lets go on textured or porous stone.
- Firm fruit only. These machines want crisp apples, not soft or mealy ones, and they mangle overripe fruit.
- Whether you can switch the peeling blade off, so it cores and slices without removing the skin.
- Replaceable blades. The peel blade dulls first, and a dull blade is why most of these end up in the cupboard.
Bottom line: clamp mount for stone counters and heavy use, suction for speed on a smooth laminate, and firm apples either way.
What the Machine Actually Does
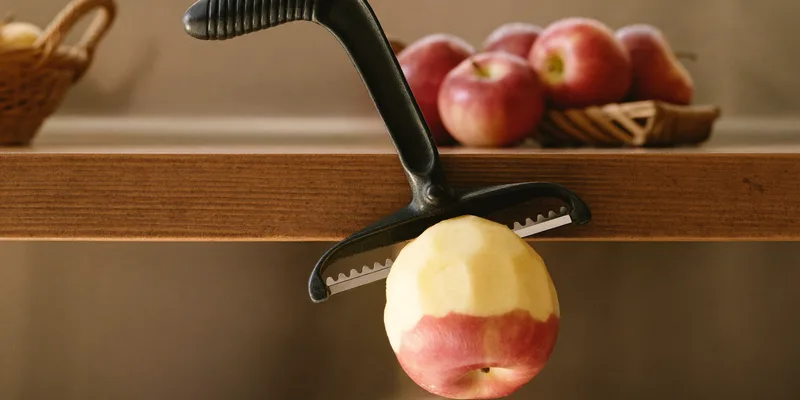
You push an apple onto a three prong fork, turn the crank, and the apple travels along a threaded shaft past three tools at once. A spring loaded blade rides the skin off, a coring tube takes the center out, and a slicing blade cuts it into one continuous spiral. Pull the spiral apart and you have rings or, with one vertical cut, a pile of even slices.
The result is more uniform than hand cutting, which matters more than it sounds. Even thickness is the whole game when you are drying apple rings or cooking a batch of sauce, because uneven pieces finish at different times.
Rings for the Dehydrator, Slices for Sauce
Leave the spiral intact and you get rings that lie flat on a dehydrator tray, which is the fastest way to fill one. Cut the spiral down one side and it falls into crescents for sauce, pie or the freezer. Our guide to dehydrating apples covers the drying end of that workflow.
Clamp or Suction, and Why It Decides Everything
The mount is the single biggest source of frustration. A screw clamp grips the edge of a counter or table and does not move, which is what you want when you are cranking through a bushel. It needs an overhanging edge with clearance underneath, which some kitchen islands and thick stone tops do not offer.
A suction base sets up anywhere in seconds and works well on smooth, non porous surfaces. On textured laminate, honed stone or a slightly wet counter it releases mid apple, which is the complaint owners report most about these machines. Wipe the surface dry, press the lever hard, and test it before you load the first apple.

The Cast Clamp Style
The old style cast machines that clamp to the table are heavier, steadier and generally last longer. They suit anyone processing real quantities, and they suit a workbench or a picnic table outside better than a modern kitchen. If you are doing bushels rather than bowls, this is the version to buy.

Which Fruit It Handles
Firm apples, cleanly. Crisp varieties hold their shape on the fork and take an even peel. Soft, mealy or overripe apples tear off the prongs and come out shredded, which is the most common reason people conclude the machine is junk. Sort your fruit and put the soft ones aside for sauce made with a food mill instead.
Pears vary. Firm ones work, ripe ones do not, and pear skins are thinner so the blade setting matters more. Potatoes are the other common use and generally work well, though very large or very knobbly ones defeat the fork. Anything smaller than a small apple will not seat on the prongs at all.
Blades, Adjustment and Keeping It Working
The peeling blade is on a spring arm and follows the contour of the fruit. Two adjustments matter: how deep the blade sits, which controls whether you lose flesh with the peel, and the arm tension. Set it too shallow and it skips patches of skin, too deep and you throw away the best part of the apple.
Blades dull, and dull blades tear. Most machines let you swap the peel blade, and a spare set is the cheapest thing you can do for a machine that has started to disappoint. Rinse and dry it immediately after use, since apple acid on a carbon steel blade spots overnight.

Choosing by the Job
The table pairs the common apple jobs with the setup that suits them. Suitability is practical experience with these tool types rather than a manufacturer specification.
| Job | Setup | Why | Watch for |
|---|---|---|---|
| Dried apple rings | Peel, core and slice, keep the spiral | Even rings lie flat and dry at one rate | Browning while you work |
| Applesauce by the gallon | Core and slice, skip the peeling | A food mill removes skins later anyway | Soft fruit tearing on the fork |
| Pie filling | Full peel, then cut the spiral | Uniform slices cook evenly | Blade depth wasting flesh |
| Freezing slices | Full peel, pretreat, then freeze flat | Uniform pieces freeze and thaw evenly | Skipping the pretreatment |
| Potatoes | Peel only, clamp mount | Heavier load wants a firm mount | Knobbly shapes jamming the blade |
Stopping the Browning
Peeled apples brown fast, and a machine produces them faster than you can deal with them. Drop the rings straight into a bowl of water with a pretreatment as you go, which keeps the batch light colored through the whole session. Ascorbic acid based products are the usual choice and lemon juice is the kitchen version.
This matters most for drying, where the color you put on the tray is close to the color you get in the jar. Our guide to dehydrating apples covers pretreatment options, and citric acid for canning explains where acid does a safety job rather than a cosmetic one.
Frequently Asked Questions
Why does my apple peeler keep tearing the apple? Usually the fruit rather than the machine. Soft or mealy apples cannot resist the blade pressure and shred off the fork. Use firm crisp fruit, seat it fully on all three prongs, and check that the peel blade is sharp and not set too deep.
Does the suction base work on granite? On polished granite it usually holds. On honed, leathered or textured stone it lets go, and so does a damp counter. Wipe the spot dry, press the lever firmly, and if your counters defeat it, use a clamp model or clamp it to a table instead.
Can it core without peeling? On most models yes, by swinging the peel blade out of the way. That is the setting for applesauce, since the skins get removed by the food mill later and they add color to the sauce.
Will it do pears or potatoes? Firm pears and ordinary potatoes generally work. Ripe pears are too soft to hold shape, and very large or knobbly potatoes fight the fork. Very small fruit will not seat on the prongs at all.
Is it dishwasher safe? Check the listing for your model. Many have carbon steel blades or painted cast parts that do better with a rinse and an immediate dry. Apple acid left on the blade overnight leaves spots that turn into pitting.
The Bottom Line
Pick the mount that matches your counter, buy firm apples, set the blade depth so you are peeling skin rather than flesh, and keep a spare blade in the drawer. Leave the spiral whole for dehydrator rings, cut it for sauce and pie, and drop everything into a pretreatment bath as you go. Read next: dehydrating apples for the drying side, and food mills for turning the soft fruit into sauce.