Last updated: August 23, 2026
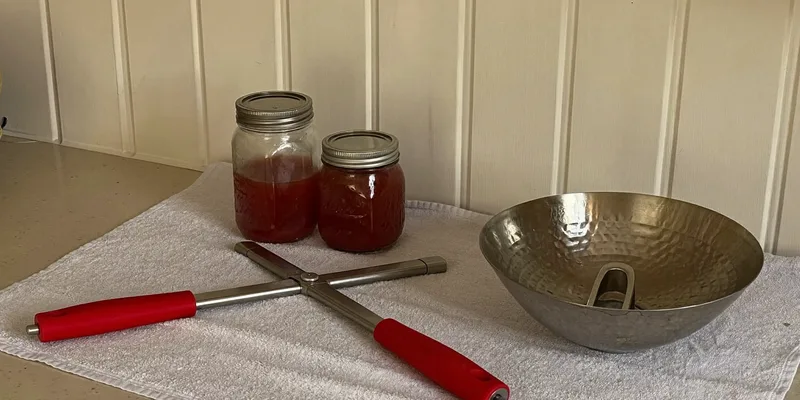
Canning has a reputation for requiring a drawer full of single purpose gadgets, and the store display does nothing to argue otherwise. In practice the list of tools that genuinely change how a canning day goes is short, maybe five items, and everything past that is convenience you can decide on later.
This is the hub for those tools. What each one does, whether a normal kitchen item can stand in for it, and where the deeper guide lives for the ones worth choosing carefully. If you are outfitting a kitchen for the first time, work down this page and stop where your budget does.
This article contains affiliate links. If you buy through them, we may earn a commission at no extra cost to you. Learn more.
Quick Answer
Which canning tools do you actually need?
- A jar lifter and a wide mouth funnel are the two with no real substitute.
- A rack keeps jars off the canner bottom, which the NCHFP names as a cause of jar breakage.
- A bubble remover with a headspace notch replaces guessing with measuring, for very little money.
- A magnetic lid wand, labels and a thermometer are the useful extras, in that order.
Bottom line: lifter, funnel, rack, bubble tool. Everything else is optional until you know what you make most.
The Four Tools With No Substitute
A jar lifter, a wide mouth funnel, a canner rack and a bubble remover. Those four handle the four moments where a normal kitchen has no answer: lifting a hot full jar, filling it without coating the rim, keeping it off the canner floor, and getting the trapped air out before the lid goes on.
Everything else in the aisle either saves a few seconds or covers a specific kind of preserve. That is not a reason to avoid them, it is a reason to buy them once you know whether you are a jam household or a pickle household.
The Jar Lifter
The one tool people try to skip and immediately regret. A jar lifter has curved rubberized jaws that grip the neck of a jar below the band, so a full quart comes vertically out of boiling water without tipping. Kitchen tongs slip on wet glass, and a slipped quart is boiling liquid and broken glass on a kitchen floor.
What separates a good one from a poor one is the spring and the jaw coating. A weak spring means you are squeezing hard while holding something heavy, and a slick coating means the jaws walk on the glass. Our jar lifter and canning tongs guide goes into what to look for.

The Wide Mouth Funnel
A canning funnel is short, wide and straight sided, so it sits inside the jar mouth and directs food down without splashing the rim. A rim with food on it is the most preventable cause of a jar that does not seal, and the funnel removes that failure mode entirely for a very small outlay.
Get a stainless one with a wide mouth diameter and a lip that rests on the jar, and check whether it also fits regular mouth jars if you own both. Some newer designs have a headspace scale marked on the inside, which quietly does two jobs at once. Full detail is in our canning funnel guide.

The Rack
Jars should never sit directly on the bottom of a canner. The National Center for Home Food Preservation names jars placed directly on the canner bottom instead of on a rack as a cause of jar breakage, because the base of the pot is the hottest surface and the temperature difference stresses the glass.
A rack also keeps jars from knocking into each other during a rolling boil and lets water circulate underneath. Racks rust, which is the single most common complaint about them, and there are ways around that covered in our canning rack guide.

The Bubble Remover and Headspace Tool
Air trapped between the pieces in a packed jar does two unhelpful things. It takes up space you thought was food, so the jar ends up underfilled, and it can affect how well the vacuum forms. The bubble remover is a thin plastic blade you run around the inside of the jar to release those pockets, and most of them have headspace measurements notched into one end.
That notch is why the tool matters more than it looks. Headspace requirements differ by food and are specified in each tested recipe, and the NCHFP’s jam and jelly guidance calls for one quarter inch on jams and jellies alone. Measuring takes a second and removes the most common reason a jar behaves differently from the one next to it.
Do Not Use a Metal Knife
The traditional substitute is a table knife, and it works for the bubbles but scratches the inside of the jar. Scratched glass is weaker glass, and weak glass is what breaks in a canner. A plastic bubble tool costs almost nothing and does not do that.

The Useful Extras
| Tool | What it does | Substitute | Buy it when |
|---|---|---|---|
| Magnetic lid wand | Lifts flat lids out of hot water without fingers | Clean fingers, carefully | You do big batches |
| Labels | Puts a name and date on every jar | Masking tape and a marker | Immediately, honestly |
| Jam thermometer | Hits the same set point twice in a row | The cold plate test | You make jam or jelly often |
| Kitchen scale | Weighs fruit, sugar and salt accurately | Measuring cups, less precisely | You follow weight based recipes |
None of these four are required for a safe batch. They are the tools that make a repeatable batch, which is a different and eventually more useful thing.
A Note on Thermometers
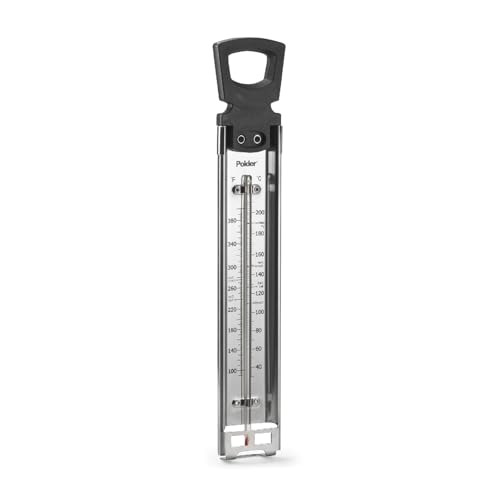
A candy or jam thermometer is the difference between jam that sets reliably and jam that sets sometimes. Sugar concentration determines the set, and temperature is the practical proxy for it, so hitting the same reading each time reproduces the same result. Use the endpoint your recipe specifies rather than a number from another recipe.
What a jam thermometer is not is a food safety instrument for canning. Processing safety comes from the tested time and method in the recipe, not from a reading you take yourself. If a recipe does not give you a temperature endpoint, use the cold plate test instead of inventing one.
Frequently Asked Questions
What canning tools do I really need to start? A jar lifter, a wide mouth funnel, a rack for the canner and a bubble remover with a headspace notch. Those four cover the jobs a normal kitchen cannot do with something it already owns.
How do I get air bubbles out of a packed jar? Run a plastic bubble remover down the inside of the jar and around the food, then recheck the headspace and top up if needed. Do not use a metal knife, since it scratches the glass and scratched glass is more likely to break.
Is a canning utensil kit better value than buying separately? Usually yes for the core tools, since the five piece sets bundle the lifter, funnel, bubble tool, wand and tongs for less than buying them one at a time. Our canning kit guide covers what those sets leave out.
Do I need a magnetic lid wand? No, but it is pleasant. It exists to lift flat lids out of warm water without touching the sealing compound, which matters more when you are moving quickly through a big batch.
Can I use kitchen tongs instead of a jar lifter? Not safely. Kitchen tongs cannot hold a full hot quart vertically on wet glass, and a dropped jar is boiling liquid and broken glass. This is the one substitution not worth attempting.
Do I need a thermometer for canning? Not for safety, since processing times and methods come from the tested recipe. A jam thermometer is useful for hitting a consistent set on jams and jellies, which is a quality question rather than a safety one.
The Bottom Line
Four tools do the heavy lifting: a jar lifter for the hot jars, a wide mouth funnel for clean rims, a rack so nothing sits on the canner floor, and a bubble remover that doubles as your headspace gauge. Add labels straight away, a magnetic wand if your batches are large, and a thermometer if you make jam often. That is a complete canning drawer, and it is much shorter than the store display suggests. From here, the canning supplies checklist covers the whole setup and the canning kit guide covers whether to buy it bundled.