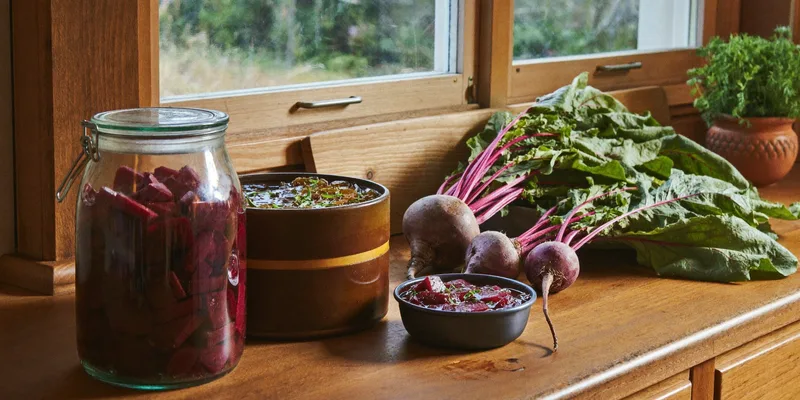
Last updated: August 23, 2026
Beets are the vegetable most people ferment second. The cabbage worked, there is a bag of beets in the crisper drawer that has been there since the farm share in October, and roasting them one more time has stopped being appealing. A jar of fermented beets is tart, earthy and keeps for months, and the whole project takes about ten minutes of hands on work.
Beets do behave differently from cabbage and cucumbers, though, and the difference is sugar. They are the sweetest common ferment vegetable, which changes the pace, the smell and the failure modes. This page covers the prep that matters, the gear that keeps a batch under the brine, and how to read a beet ferment that has gone yeasty rather than sour.
This article contains affiliate links. If you buy through them, we may earn a commission at no extra cost to you. Learn more.
Quick Answer
How do you ferment beets?
- Peel, cut into even pieces, pack into a jar and cover with a salt brine made to a tested recipe.
- Weight everything below the brine and fit an airlock lid, then leave it at room temperature.
- Beets are sweet, so they ferment briskly and can turn yeasty if the room is warm.
- Taste from about a week onward, then move the finished jar to the refrigerator.
Bottom line: even pieces, a real weight, and a cool spot are what separate a tart, crisp jar from a soft, foamy one.
Why Beets Ferment Differently
Sugar content is the whole story. Beets carry far more sugar than cabbage or cucumbers, so the bacteria have more to work with and the ferment starts fast and produces a lot of gas. That is also why beets are more prone to yeasty, foamy or slightly alcoholic results if the room is warm or the batch is left too long.
The practical response is to keep the jar somewhere cool, use an airlock lid rather than a sealed one, and start tasting earlier than you would with kraut. A beet ferment that has gone past its window tastes boozy rather than sour, and that is a timing problem rather than a safety one.
Beet Kvass Is the Other Project
Kvass uses the same jar and the same salt brine but larger chunks and more water, and what you are after is the liquid rather than the vegetable. It ferments faster because you are drinking it young. Same gear, different intent, and many people run both from one bag of beets.
Prep: The Part That Decides Texture
Peel them. Beet skin carries soil, and soil carries the organisms most likely to make a batch smell wrong. Scrub and peel, trim the top and root, then cut into pieces of a consistent size, because a jar of mixed thick and thin pieces ferments unevenly and the thin ones go soft first.
Cut size sets the timeline. Shredded beets ferment fastest and end up soft, batons and slices hold texture well and are the general purpose choice, and large chunks are for kvass where you want the liquid. Pick one form per jar rather than mixing.
Salt Comes From a Tested Source
Take the salt concentration from NCHFP or a university extension publication on brined vegetables rather than from a ratio you remember, because salt level is what keeps lactic acid bacteria ahead of spoilage organisms. Use canning or pickling salt, since NCHFP notes iodized salt can darken vegetables and cloud the brine. Our brine ratio page explains where the published numbers live.

The Gear for a Beet Jar
The same three items that every vegetable ferment needs, with one adjustment. Beet pieces are dense and mostly sink, which is helpful, but the shreds and small offcuts float and stain everything they touch. A weight that covers the full jar diameter matters more here than with cabbage.
Quart wide mouth jars suit beets well because a full half gallon of fermented beets is more than most households get through before the texture softens. Two quart jars started a week apart beat one big jar for eating quality.
Best jar size for beets
Quart wide mouth jars let you make a manageable amount, fit a weight, and still see the brine level through the glass. Wide mouth is not optional if you want the beets back out in one piece.

Best weight for floating shreds
A flat weight that spans the jar keeps small pieces submerged instead of letting them ride up the sides. Our weights guide compares glass, ceramic and the improvised options.
Running the Ferment and Reading It
Pack the jar, cover with brine from your tested recipe, weight it and fit an airlock lid. Expect visible bubbling within a couple of days and a deep red brine within three or four. Keep the jar out of the sun and out of the warmest corner of the kitchen, because beets react to heat more than most vegetables do.
Start tasting at around a week. It is ready when the brine is pleasantly sour and the beet still has bite. Once it tastes right, the jar goes in the refrigerator, where the process slows to a crawl and the flavor keeps improving slowly for weeks.
When It Smells Wrong
Yeasty, bready or boozy means the ferment ran too warm or too long, and the batch is usually still edible but past its best. A flat white film is normally kahm yeast rather than mold, and our comparison page shows the difference. Fuzzy colored growth means discard, in line with NCHFP guidance on brined vegetables.
Cut Sizes and What Each Gives You
One vegetable, four useful formats. Choose by what you actually want to eat, since the same brine and the same jar handle all of them.
| Format | Pace | Texture | Best use |
|---|---|---|---|
| Shredded | Fastest | Soft, slaw like | Salads and sandwiches, eat sooner |
| Slices or coins | Moderate | Tender with bite | The general purpose jar |
| Batons or sticks | Moderate | Crisp longest | Snacking straight from the jar |
| Large chunks for kvass | Fast for the liquid | Vegetable is secondary | Drinking the brine |
Timings above are relative rather than absolute, since room temperature moves all of them; use taste as the finishing test.
Frequently Asked Questions
How long do fermented beets take? Most household jars are ready to taste at around a week and are done somewhere between one and three weeks depending on room temperature and cut size. Warm kitchens finish much faster. Taste rather than the calendar is the test, and beets in particular go past their window quickly.
Do I have to peel beets before fermenting? Peeling is the safer habit, because beet skin holds soil and soil holds the organisms most likely to spoil a jar. Scrubbing very thoroughly is the alternative if you prefer to keep the skin, but peeled beets give a cleaner tasting and more reliable result.
Why did my beet ferment go slimy? Usually a warm room, too little salt, or a batch left running long past its window. Slimy brine in a beet or carrot ferment sometimes resolves as fermentation continues, but if it smells wrong rather than sour, discard it and start again with a tested salt amount.
Can I ferment beets and other vegetables together? Yes, and beets are commonly fermented with carrots, cabbage, garlic or ginger. Keep the pieces a similar size so they ferment at the same pace, and expect everything in the jar to end up beet colored, which is a feature rather than a fault.
Can fermented beets be canned for the shelf? Only with a tested recipe, and canning kills the live cultures that were the point. For shelf stable beets, use a tested pickled beet recipe and process it as written. Our water bath guide covers the method side.
What about beet powder supplements? Different product and a different aisle. Fermented beet powders sold as supplements are a nutrition product rather than a preserving project, and we stick to what happens in a jar in your kitchen.
The Bottom Line
Beets are an easy second ferment as long as you respect the sugar. Peel them, cut them to one size, take the salt amount from a tested NCHFP or extension source, weight everything under the brine, and start tasting earlier than you would with sauerkraut. Two quart jars beat one big one, because fermented beets are best in the window where they are still crisp. Next: what else is worth fermenting, and weights that actually hold pieces down if that is where your last batch went wrong.