Last updated: August 23, 2026
The first dehydrator season teaches the same lessons to almost everybody. Apple slices turn brown, the jar of tomatoes grows a spot of mold in November, and the drying time in the booklet turns out to be a suggestion rather than a fact. None of that means the machine was a mistake.
Drying is forgiving about most things and unforgiving about four: how thick you cut, what temperature you run, whether you pretreat, and how you store the result. Get those right and the rest is detail. This guide works through them in the order they bite, with the free corrections first.
This article contains affiliate links. If you buy through them, we may earn a commission at no extra cost to you. Learn more.
Quick Answer
What are the most common dehydrating mistakes?
- Cutting unevenly. One thickness per tray is the single biggest improvement most people can make.
- Guessing the temperature. Penn State Extension suggests starting at 145 degrees F, then dropping to 135 to 140 degrees F after one hour.
- Skipping pretreatment on light fruit, which is why apples and pears turn brown.
- Storing straight from the trays. The NCHFP calls for conditioning fruit in jars for seven to ten days first.
Bottom line: even slices, a checked temperature, pretreated fruit and conditioned storage fix nearly every disappointing batch.
Mistake One: Uneven Slices
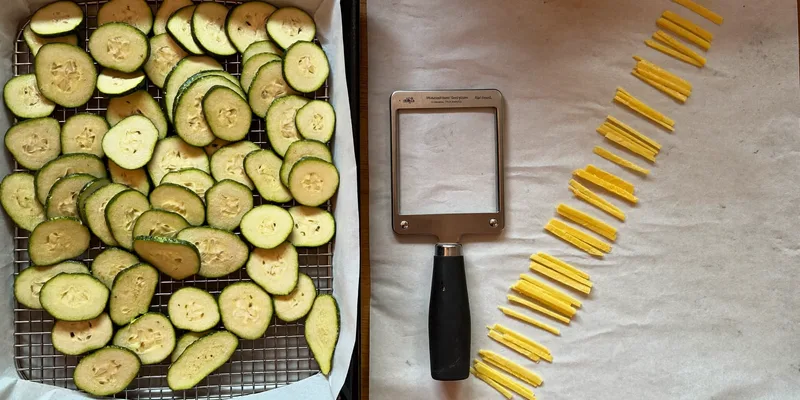
Thickness drives drying time more than any other variable, and it compounds. A tray with slices ranging from paper thin to a quarter inch cannot finish as a batch, so you either pull it while some pieces are still moist or you overdry the rest waiting. Every downstream problem starts here.
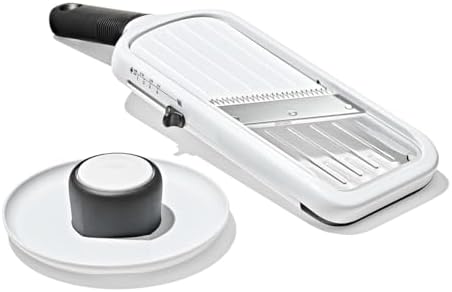
Hand cutting is fine for a bowl of apples. For a bushel of tomatoes or a tray of potatoes, a slicer with a thickness setting turns an afternoon of uneven work into a consistent load. Set one thickness, cut the whole batch, and only then start the machine.
Best if you dry tomatoes, apples or potatoes in quantity
Density Counts as Thickness
A dense slice of sweet potato and an airy slice of zucchini of the same thickness do not dry at the same rate. Group foods by type rather than filling a tray with whatever is on the counter, and keep one food per tray where you can, so you can pull a finished tray without disturbing the rest.
Mistake Two: Running the Wrong Temperature
Too low and the batch takes a day and risks spoiling before it dries. Too high and the outside hardens while the middle stays wet, a fault called case hardening that hides moisture inside a piece that feels finished. Both show up as mold weeks later.
Penn State Extension suggests starting at 145 degrees F while surface moisture is still present, then reducing to 135 to 140 degrees F after one hour to finish. Meat is the exception with a rule of its own: the USDA Meat and Poultry Hotline recommends cooking meat to 160 degrees F and poultry to 165 degrees F before drying, because a dehydrator does not reach those temperatures during the run.
Trust a Thermometer, Not the Dial
Dials are printed, not calibrated. Put a thermometer on a middle tray, let the machine come up to heat, and note the difference. A machine that runs cool is the usual reason a recipe time turns out to be optimistic, and knowing the offset is more useful than any chart.
Mistake Three: Skipping Pretreatment
Light colored fruit oxidizes the moment it is cut, which is why home dried apples and pears often look nothing like the ones in the store. Pretreating is a short soak, not a project, and it also helps the fruit keep its texture and vitamin content during a long run.
Penn State Extension gives a specific dip: place cut fruit in a solution of three and three quarter teaspoons of powdered ascorbic acid, or half a teaspoon of powdered citric acid, in two cups of water for ten minutes. Vegetables have their own step, since many of them are blanched before drying rather than dipped. Our guide to drying apples works through the fruit side in detail.
Mistake Four: Guessing Instead of Testing for Dryness
Warm food always feels softer than it is, so a piece straight off the tray tells you very little. Let a sample cool before you judge it. Penn State Extension describes dried fruit as pliable with no beads of moisture when pressed between your fingers, and vegetables as tough, brittle or crunchy.
Times printed in booklets are estimates built around a particular load, humidity and slice. Treat them as a rough guide for when to start checking rather than a schedule. Keeping a notebook of what your machine actually took for each food is worth more within a season than any chart you can buy.
Best reference to keep next to the machine

Mistake Five: Storing Straight From the Trays
This is the mistake that ruins good batches weeks after the work is done. Pieces from one tray never finish at exactly the same moisture level, and a jar that averages out fine can still have one damp piece that seeds mold. Conditioning solves it before storage.
The NCHFP directs you to pack cooled dried fruit loosely into plastic or glass jars, seal them, and let them stand for seven to ten days, shaking daily so the drier pieces absorb the excess. If condensation appears inside the jar, the fruit goes back into the dehydrator. Only after that does it go into long term storage.
Then Get the Air Out
Once conditioned, dried food keeps best sealed and dark. A jar sealer attachment pulls the air out of a mason jar without changing the food, which suits dried fruit, vegetables and herbs well, and lets you open one jar at a time. Our guide to storing dehydrated food covers jars, bags and desiccants together.
Best for sealing conditioned dried food into jars

The Five Mistakes at a Glance
Each row pairs the mistake with the thing you notice and the correction. The middle column is the one worth memorizing, because most of these announce themselves long after the batch is done.
| Mistake | What you notice | The correction | When it shows up |
|---|---|---|---|
| Uneven slices | Some pieces brittle, others tacky | One thickness for the whole batch | During the run |
| Wrong temperature | Hard shell, soft middle | Check with a thermometer, follow extension ranges | Weeks later, as mold |
| No pretreatment | Brown apples and pears | Ascorbic or citric acid dip | Immediately |
| No conditioning | One moldy piece in a good jar | Seven to ten days in jars, shaken daily | One to two months later |
Frequently Asked Questions
Why do my tomatoes take so much longer than everything else? Tomatoes hold a lot of water and their skins slow evaporation. Slice them to an even thickness, lay the cut faces up so the juice does not pool, and leave real gaps between slices. Halved cherry tomatoes take longer still than sliced larger ones.
Do I have to blanch vegetables before drying? Many vegetables are blanched to stop the enzyme activity that costs color and flavor in storage. Follow the guidance for the specific vegetable from an extension service rather than a general rule, since a few are dried without blanching.
What is case hardening? It is a dry shell trapping moisture inside the piece, caused by running too hot at the start or by air that is too dry for the food. The piece feels done and is not, which is exactly the situation conditioning is designed to catch.
Can I use my oven instead of a dehydrator? You can for small batches if your oven holds a low enough temperature and you prop the door open for airflow. Most ovens do not go low enough to hold a steady drying temperature, which is the practical reason people move to a dedicated machine. Our dehydrator guide compares the options.
How long does home dried food keep? It depends on the food, the moisture left in it and the storage. Penn State Extension notes that the shelf life of dried fruit increases when it is stored in the freezer or refrigerator, so cool and dark beats a sunny shelf every time.
The Bottom Line
Cut to one thickness, verify what temperature your machine is really running, pretreat light fruit, test cooled pieces rather than warm ones, and condition before storing. Those five habits turn a hit and miss dehydrator into a dependable one, and only two of them involve buying anything. Read next: our dehydrator buying guide for the machine itself, and storing dehydrated food for the part that happens after the trays come out.