Last updated: August 23, 2026
The meal that looked perfect on the tray in the kitchen arrives at camp as a bag of gravel. Fifteen minutes of soaking and the beans are still hard, the beef is chewy, and the sauce has gone thin and separate. Most people conclude that home dried backpacking meals do not really work.
They do, but the rules are different from ordinary dehydrating. A meal has to rehydrate in whatever water you can boil on a small stove, in the time you are willing to wait, at whatever temperature the air is that evening. That constraint shapes how you cook the components, how you cut them, and how you pack them.
This article contains affiliate links. If you buy through them, we may earn a commission at no extra cost to you. Learn more.
Quick Answer
How do you dehydrate backpacking meals that actually rehydrate?
- Cook everything fully before it goes on the tray. Dried raw beans and rice will not come back in a camp pot.
- Cut small and thin. Rehydration speed is governed by piece size more than anything else.
- Use lean meat only, and rinse the cooked ground beef, because fat does not dry and goes rancid in the pack.
- Pack single meals, and get the air out for anything you are storing beyond a trip or two.
Bottom line: cook first, cut small, keep the fat out, and store sealed and cool.
Why Home Dried Meals Rehydrate Badly
Freeze dried commercial meals have an open, porous structure, so water floods back in. Dehydrated food shrinks and closes up instead, so water has to soak in slowly from the outside. That single difference explains almost every disappointing camp dinner, and it is why technique carries so much weight here.
Everything in this guide is aimed at shortening that soak. Smaller pieces, fully cooked starches and no fat in the way all mean water reaches the middle of a piece sooner. Our comparison of freeze drying and dehydrating explains the structural difference in more depth.
Cook It Completely First
Rice, pasta, lentils and beans must be cooked through before drying. Dried raw grains simply return to being raw grains that need a full boil, which is not what you want on a canister stove. Cook them slightly softer than you would at home, then spread them thin.
The Meat Rule Is Not Optional
Meat carries a genuine safety step that vegetables do not. The USDA Meat and Poultry Hotline recommends cooking meat to 160 degrees F and poultry to 165 degrees F before the dehydrating process begins, because the dehydrator will not bring the meat to those temperatures before it dries.
FSIS explains the mechanism plainly: inside a dehydrator, evaporating moisture absorbs most of the heat, so the meat itself does not begin to rise in temperature until most of the water has gone, by which point surviving bacteria have become more heat resistant. Cook first, then dry.
Lean, and Then Rinse It Anyway
Fat does not dehydrate. It stays as fat, it turns rancid in a warm pack, and it coats the dried pieces so water cannot get in. Use the leanest ground meat you can buy, brown it, then rinse the cooked crumbles with hot water and blot them before they go on the tray. Our jerky dehydrator guide covers the meat side of drying in more detail.
Build the Meal in Components
Drying a finished casserole gives you a slab that rehydrates from the outside in. Drying the components separately and combining them in the bag gives you control, because each ingredient can be cut and dried on its own terms and you can adjust portions per trip.
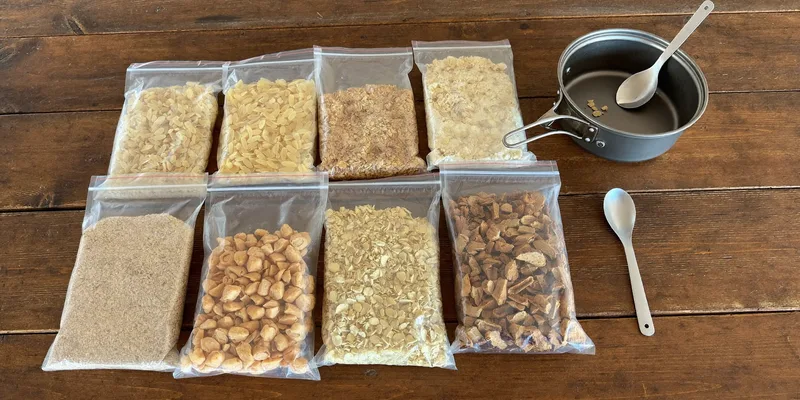
The practical routine is to dry a few staples in bulk, then assemble meals from jars. Cooked ground beef, cooked rice, refried beans spread thin as a leather, tomato sauce dried into a powder, diced vegetables and a good stock powder cover a surprising number of dinners between them.
Best machine layout for long unattended meal batches

Sauces Dry as Leathers
Any sauce or puree goes onto a solid sheet in a thin, even layer, dries to a brittle leather, and then breaks up or grinds into a powder that dissolves quickly in the pot. That powder is the single biggest upgrade to home dried camp food, because it turns a watery bag into an actual sauce.
Best sheets for sauces, purees and refried beans

Packing So It Survives the Pack
Two enemies work on a meal between the kitchen and the trail: moisture and oxygen. Moisture undoes the drying, and oxygen goes after any fat that is left. Condition the dried components first, the way the NCHFP directs for dried fruit, by holding them in sealed jars for seven to ten days and shaking daily so the moisture equalizes.
For a trip in the next few weeks, a sealed bag per meal is enough, and it doubles as the vessel you can pour boiling water into if you use a bag rated for it. For a season of meals sitting in a closet, use a heavier barrier with an oxygen absorber, the same approach covered in our guide to mylar bags.
Best for storing a season of prepped meals

What Rehydrates Well and What Does Not
Some foods come back almost perfectly and others never do. Plan menus around the first group and use the second only in small supporting quantities, where a bit of chewiness does not matter.
| Component | Prepare it like this | Rehydrates | Notes |
|---|---|---|---|
| Cooked rice and pasta | Cook soft, rinse, spread thin | Very well | Small shapes beat long noodles |
| Lean ground meat | Cook to the FSIS temperature, rinse, blot | Well if lean | Fat is what makes it chewy |
| Sauce and refried beans | Dry thin on a solid sheet, then grind | Instantly | The biggest single improvement |
| Diced vegetables | Cook or blanch, cut small | Reasonably | Carrots and corn stay firm |
Rehydrating at Camp
Add boiling water, stir once, seal the bag or pot, and insulate it. Time in a warm, closed container does more than extra heat, and a cozy made from a folded jacket or a purpose made pouch keeps the temperature up while the food soaks. Stir again halfway.
Cold soaking works too if you start early. Add water to the bag at lunch and the meal is ready by evening, which suits days when you do not want to carry fuel. Either way, a splash of extra water is easier to fix than a bag of soup, so start on the dry side.
Frequently Asked Questions
How long do home dehydrated meals keep? Treat them as a season rather than a decade. The remaining fat in meat is the limiting factor, so meals containing meat should be used soonest, and everything keeps longer cool, dark and sealed. Label every bag with the date and contents.
Can I dehydrate a meal I already cooked as a casserole? You can, and it will dry, but a solid slab rehydrates slowly and unevenly. Break it up as much as possible before it goes on the tray, spread it thin, and expect a longer soak than the component approach needs.
Why does my dried ground beef stay chewy? Fat, almost always. Use the leanest grind available, rinse the cooked crumbles with hot water, and blot them dry before drying. Adding a little breadcrumb or oat to the meat while it cooks also helps it stay open rather than shrinking into pellets.
Do I need to condition camp meals like dried fruit? Yes, and it matters more here because the components are mixed. The NCHFP conditioning step, seven to ten days in sealed jars with a daily shake, catches the piece that was not quite dry before it spoils a whole meal bag.
Is a dedicated dehydrator worth it just for backpacking food? If you take more than a couple of trips a year, yes, mostly because a machine with even airflow lets you run long batches without babysitting. Our dehydrator buying guide sets out what capacity actually gets used.
The Bottom Line
Cook the starches through, hit the FSIS temperature for meat before it goes on the tray, keep fat out of the bag, dry sauces into powder, and condition before you pack. Do that and a home dried dinner is genuinely better than what you can buy, at a fraction of the weight cost you feared. Read next: our dehydrator buying guide and storing dehydrated food for the packing side.