Last updated: August 23, 2026
You spent a day drying tomatoes and they came off the trays perfect. Three weeks later the jar on the shelf holds something leathery and slightly damp, and there is a bloom of something at the bottom that ends the argument. The drying went fine. The storage did not.
Dried food is not shelf stable because it is dry today. It is shelf stable because it stays dry, and every bit of moisture and oxygen you leave in the container is working against that. The good news is that the whole problem comes down to four steps, and the gear involved is inexpensive compared with the dehydrator you already bought.
This article contains affiliate links. If you buy through them, we may earn a commission at no extra cost to you. Learn more.
Quick Answer
How do you store dehydrated food so it stays dry?
- Cool it completely first. Warm food in a sealed jar creates its own condensation.
- Condition it, which means resting the batch in a loosely filled container for days and shaking daily so any leftover moisture spreads out and shows itself.
- Pack it in glass or mylar, not in the bag it dried in, and get the air out.
- Keep it cool and dark. Heat and light do more damage to stored dried food than time does.
Bottom line: conditioning is the step people skip, and it is the one that catches a batch before it spoils a jar.
Why Dried Food Goes Soft Again
Two things bring moisture back. Uneven drying inside the batch, where a few pieces held more water than the rest and then shared it around in the jar, and moisture pulled in from the room through a lid that is not truly airtight. Both feel like the food rehydrated on its own.
Dried food is hygroscopic, which simply means it takes water out of the air until it reaches a balance with its surroundings. A kitchen in August is a humid room. That is why a jar that felt crisp when you filled it can feel leathery a fortnight later without anything having gone wrong during the drying.
Conditioning, the Step Almost Everyone Skips
Conditioning evens out the moisture that remains in a finished batch, so no single wetter piece can spoil the whole container. Colorado State University Extension describes placing the cooled dried fruit loosely in large plastic or glass containers about two thirds full, keeping them in a warm dry ventilated place for four to 10 days, and stirring or shaking daily to separate the pieces.
During those days you are watching for condensation on the inside of the glass. If any appears, the batch is not dry enough and goes back into the dehydrator. If none appears by the end, the moisture has distributed evenly and the batch is ready for its long term container.
Why It Matters More Than It Sounds
A tray of apple rings is never uniformly dry. Pieces at the edge of the tray, thicker slices and the ones that overlapped all hold more water. Sealed straight into a jar, those few pieces raise the humidity inside the whole container. Conditioning is the cheap insurance against exactly that.
Containers That Actually Hold a Seal
Glass jars with a proper lid, mylar bags, or vacuum sealed bags. Those are the three that work. Zip top bags, screw top plastic containers and the bag the fruit came in are all permeable enough that a humid pantry finds its way in over months.
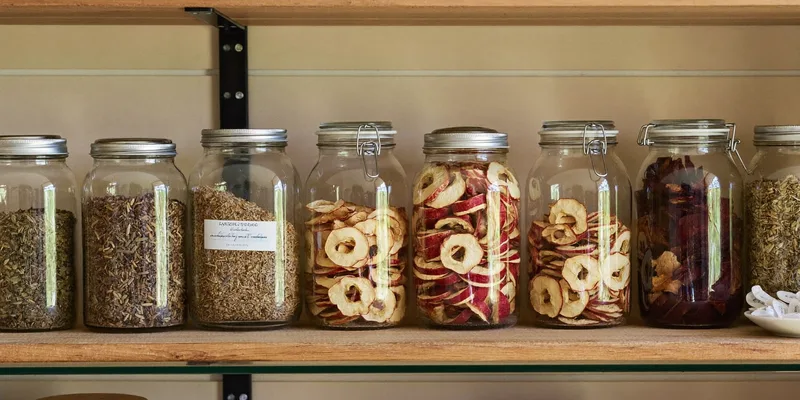
Glass is the practical default for anything you open regularly, since you can see the contents and the jar survives being refilled forever. Mylar is the choice for food you are putting away and not touching, because the foil layer blocks light and moisture far better than any clear container.
Getting the Air Out of a Jar
A jar sealer attachment pulls the air from a standard canning jar using a vacuum sealer, which removes most of the oxygen without removing the convenience of a jar you can reopen. It is the single most useful accessory for anyone who dries food regularly and stores it in the kitchen.

One honest limit belongs here. Vacuum sealing a jar of dried food is a storage improvement, not a canning process, and it does not make anything shelf stable that was not already dry. Our guide to jar sealers covers what that method can and cannot do.
Desiccants and Oxygen Absorbers Are Not the Same Thing
A desiccant absorbs moisture. An oxygen absorber removes oxygen. They solve different problems and using the wrong one is a common and expensive mistake, particularly in mylar packing where an absorber does nothing about humidity that is already inside the bag.
For crisp dried food in a jar you open often, a small food grade desiccant packet keeps the contents crisp between openings. For sealed long term storage, an oxygen absorber slows the oxidation that turns color and flavor stale, and mylar keeps light and moisture out around it.

The Mylar Combination
Utah State University Extension describes mylar bags of 5 to 7 mil without clear plastic windows, paired with oxygen absorbers, as the best long term protection for dried food. Mil is simply the thickness of the bag material, and thin bags puncture at exactly the wrong moment. Match the absorber capacity to the bag volume.

Matching Container to How You Will Use It
Storage is a compromise between access and protection, and the right answer changes with how often you open the container. Splitting a big batch across two container types, one working jar and the rest sealed away, usually beats choosing one for everything.
| Container | Protection from air | Best for | Watch out for |
|---|---|---|---|
| Glass jar, standard lid | Basic, reopened often | Kitchen jars in weekly use | Humidity enters at every opening |
| Vacuum sealed jar | Good, resealable | Pantry stock you dip into | Not a canning process |
| Mylar with absorber | Best, single use seal | Long term stores, bulk batches | Cutting it open ends the seal |
| Vacuum sealed bag | Good, space efficient | Freezer and bulk splitting | Sharp dried pieces pierce bags |
For the mylar route in detail, including bag thickness and absorber sizing, see the mylar bag guide and how to size oxygen absorbers.
Where You Put the Jar Matters
Cool, dark and stable beats every clever container. Heat accelerates the chemical changes that fade color and flavor, light does the same to anything on a bright shelf, and a cupboard above the stove cycles between warm and cool every time you cook, which drives moisture in and out of the food.
Label everything with what it is and when you dried it, and use the older jars first. That habit does more for the quality of what you eat than any upgrade in packaging, and it is free. Our pantry rotation guide covers a simple system for it.
Frequently Asked Questions
My dried food went soft in the jar, can I save it? Usually yes, if there is no mold and no off smell. Spread it back on the trays, dry it again, cool it completely, and this time condition the batch before jarring. If you see mold anywhere in the container, discard the whole jar rather than the visible pieces.
How long should I condition a batch? Colorado State University Extension describes four to 10 days in a loosely filled container, shaken daily. Watch the glass rather than the calendar, since visible condensation at any point means the batch goes back in the dehydrator.
Do I need both a desiccant and an oxygen absorber? Rarely both in the same container. A desiccant is for keeping crispness in a jar you keep opening. An oxygen absorber is for sealed long term storage in mylar. Adding an absorber to a damp batch does not dry it out.
Can I store dried food in the freezer? Yes, and it is a good option for high value or high fat items, provided the container is genuinely airtight so nothing picks up freezer moisture. Let containers come to room temperature before opening so condensation forms outside rather than in.
How long does home dried food keep? That depends on the food, how thoroughly it was dried and how it is stored, so published single figures are not worth much. Store it cool, dark and sealed, check jars periodically, and judge by smell, texture and appearance rather than by a date.
The Bottom Line
Storage is where good drying gets wasted. Cool the batch fully, condition it in a loosely filled container for the days your extension service describes while watching for condensation, then pack it in glass or mylar rather than a bag. Add a desiccant to jars you open often and an oxygen absorber to anything sealed away, keep it cool and dark, and label the date. Read next: jar sealers and what they can do and the long term storage method for bulk staples.