Last updated: August 23, 2026
A starter you have kept alive for three years is one forgotten fortnight away from being a jar of gray liquid. Drying a portion of it is the cheapest insurance in the kitchen: a few grams of flakes in a sealed jar, tucked in the back of the pantry, that you can bring back if the live one dies, if you go away for a season, or if a friend wants a piece of it in the mail.
This is a gear job more than a baking job. The whole thing hinges on spreading the starter thin enough, drying it slowly enough not to cook it, and getting it off the sheet in one piece. Below is which surface to spread it on, what the machine should be set to, how to flake and store it, and how to bring it back.
This article contains affiliate links. If you buy through them, we may earn a commission at no extra cost to you. Learn more.
Quick Answer
How do you dehydrate a sourdough starter?
- Feed the starter and use it at its active peak, not straight out of the fridge.
- Spread it paper thin on a solid silicone sheet or parchment, not on an open mesh tray.
- Run the dehydrator on its lowest setting, the band most machines label for herbs, or air dry it on the counter.
- Crack the dried sheet into flakes and store them sealed, cool and dark.
Bottom line: thin, low and slow. A solid sheet and the lowest setting on the dial are the only two things you need to get right.
Why Dry a Starter at All
Three reasons come up over and over. A backup, so a neglected jar is an annoyance instead of a loss. Travel, because dried flakes need no feeding and no fridge. And sharing, since a paper envelope of flakes posts anywhere while a live starter in a jar is a leaking, fermenting parcel nobody wants to receive.
There is a fourth, quieter reason. Once you have a dried backup you stop being precious about the live jar. You can experiment with hydration, flour type and schedule knowing the original is on the shelf.
Dry It When It Is Active, Not When It Is Struggling
Use a starter that has been fed and has risen, at the point where it is domed and full of bubbles. Drying concentrates what is there, so a sluggish, watery starter with a layer of hooch on top makes sluggish flakes. Feed it, wait for the peak, and dry that.
The Surface Matters More Than the Machine
Starter is a wet paste and it will run straight through an open mesh tray onto the fan below. You need a solid surface: a silicone dehydrator sheet, a fruit leather tray, or parchment cut to the tray size. Silicone is the easier of the two to work with, because dried starter releases from it by flexing rather than peeling.
Spread as thin as you can manage with an offset spatula or the back of a spoon. Thin means it dries evenly and cracks off cleanly. Thick means the center stays tacky long after the edges are done, and a tacky center is what turns a jar of flakes moldy weeks later. Our guide to dehydrator trays and sheets explains the difference between solid silicone sheets, leather trays and mesh liners.

Parchment Works, With One Caveat
Parchment is fine and free, but it must be weighted or clipped at the corners. A rear mounted fan will lift a sheet of parchment off the tray and fold it over the load. A silicone sheet is heavy enough to stay put, which is most of what you are paying for.
Heat: Use the Bottom of the Dial
Run the lowest setting the machine offers. On most dehydrators that is the setting marked for herbs, and the National Center for Home Food Preservation places herb drying at 95 degrees F to 115 degrees F, with as high as 125 degrees F needed only in humid areas. That low band is where a starter batch belongs, and there is no reason to go above it.
The point of the low setting is that you are drying a culture rather than cooking a food. Higher heat dries the sheet faster and gives you a batch that looks perfect and revives poorly. If your machine has a single fixed temperature aimed at jerky, air drying on the counter is the better route.
Air Drying Is a Real Option
Spread the same thin layer on parchment, leave it uncovered on a counter out of the sun, and let the room do it. It takes a day or two rather than hours, and it removes heat from the equation entirely. In a humid kitchen it can stall, which is exactly the situation a dehydrator solves.
Method Comparison
Three routes get you to dried flakes, and the right one depends on your kitchen more than on your baking. The table sorts them by what they ask of you.
| Method | Heat involved | What it needs | Best for |
|---|---|---|---|
| Dehydrator, lowest setting | The herb band on the dial | Solid silicone sheet or leather tray | Humid kitchens, repeatable results |
| Counter air drying | None | Parchment and patience | Dry climates, no equipment |
| Oven with the light on | Uncontrolled and usually too warm | Nothing, but hard to trust | Not recommended, ovens overshoot |
| Freeze dryer | None | A machine most bakers will not own | Long term archival batches |
Flaking and Storing the Result
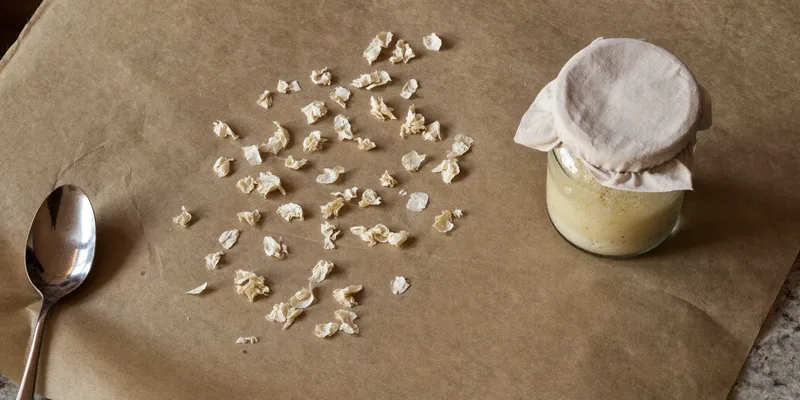
The sheet is done when it lifts off in one brittle piece and snaps rather than bends. Any part that still feels leathery goes back in. Break it into flakes with your hands, or grind it to a powder in a spice grinder if you plan to mail it in an envelope.
Store the flakes the way you would store any dried food that must stay dry: a sealed glass jar, cool, dark, out of the kitchen steam. Label it with the flour you fed it and the date. A vacuum sealed jar buys you more margin than a screw top, and our guide to mason jar sealing for dry goods covers that attachment and where it genuinely helps.

Keep Moisture Out, Not Air
Moisture is the enemy here, not oxygen. A jar in a humid pantry will soften flakes back into a sticky mass over months, and that mass is where mold starts. If the jar lives somewhere damp, add a desiccant packet. Our guide to storing dehydrated food covers conditioning, desiccants and why a jar that felt dry in August can disappoint in March.
Bringing It Back
Reviving is slower than most people expect and that is normal. Crumble a spoonful of flakes into a jar, add water, let it soften into a slurry, then start feeding it flour and water on your usual schedule. The first two feeds often look like nothing is happening.
Give it several days before you judge it. A revived starter usually needs three to five feeding cycles before it rises predictably again, and the first loaf off it is rarely the best one. If it smells sour and starts bubbling, it is working, however slow it looks.
Frequently Asked Questions
What temperature should I dehydrate sourdough starter at? The lowest setting your machine offers. On most dehydrators that is the herb band, and NCHFP places herb drying at 95 degrees F to 115 degrees F. There is no reason to run a starter hotter than that.
How long does dried sourdough starter keep? Bakers routinely revive flakes after a year or more, but keeping quality depends entirely on how dry the flakes were when they went in the jar and how dry the jar has stayed. Dry it until it snaps, seal it, and store it cool and dark.
Can I dry starter straight from the fridge? You can, but feed it and let it peak first. Drying concentrates whatever state the starter is in, so an active, well fed starter gives flakes that come back faster.
Do I need a special dehydrator for this? No, but you do need one with an adjustable thermostat that reaches the low herb setting, and a solid sheet rather than an open mesh tray. A fixed temperature jerky machine is the wrong tool.
Why is my dried starter still tacky in the middle? It was spread too thick. Thin it out next time, and put the tacky sheet back in until it snaps cleanly, because a soft center is where mold starts in the jar.
Can I grind the flakes into powder? Yes, and it makes mailing easier. A spice grinder does it in seconds. Powder revives the same way flakes do, just with a slightly faster start because there is more surface area.
The Bottom Line
Feed the starter, spread it paper thin on a solid sheet, run the lowest setting on the dial, and break the result into flakes that snap. Seal them in a labeled jar somewhere cool and dark and you have a backup that outlives most kitchen disasters. If you are choosing gear for it, our food dehydrator buying guide covers which machines hold a genuinely low setting and the trays and sheets guide covers the surface you spread it on.