Last updated: August 23, 2026
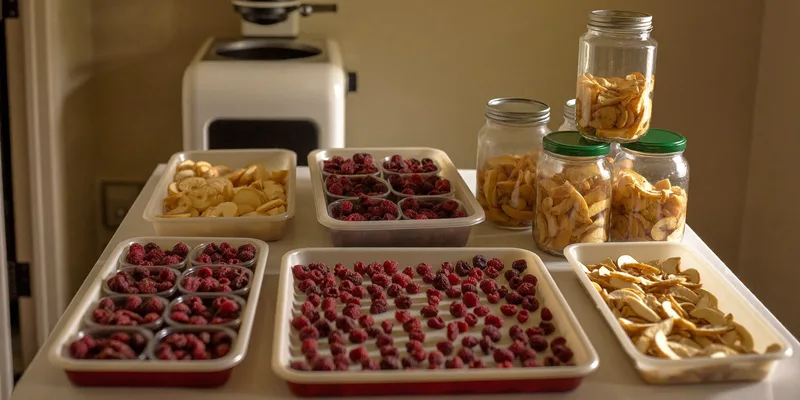
Freeze drying at home used to mean laboratory equipment. Now it means a machine the size of a small chest freezer sitting in the garage, running a cycle that takes the best part of a day and turning a tray of raspberries into something that keeps its shape, weighs almost nothing and comes back when you add water.
What the videos skip is the routine around the machine. Pre freezing, loading depth, the wait, the check for dryness that is easy to get wrong, and the packaging step that decides whether the batch is still good next winter. This is the whole process, in the order you will actually do it.
This article contains affiliate links. If you buy through them, we may earn a commission at no extra cost to you. Learn more.
Quick Answer
How does freeze drying at home actually work?
- The food is frozen solid, then a vacuum turns the ice straight to vapor, so the structure stays intact instead of collapsing.
- You prepare and load trays, start a cycle that runs many hours, then check dryness before packing.
- Pre freezing the trays in a normal freezer first shortens the cycle and improves results.
- Packaging is part of the process. Mylar with oxygen absorbers, not a zip bag.
Bottom line: the machine does the hard part, but loading depth, the dryness check and the packaging are on you.
What Happens Inside the Machine
A home freeze dryer runs three stages. It freezes the trays down hard, it pulls a deep vacuum and applies gentle heat so the ice sublimates directly to vapor, and it finishes with a secondary drying phase that removes the small amount of water still bound in the food.
The vapor collects as frost on the chamber walls, which is why you defrost and drain after a cycle. Because the water never turns liquid inside the food, the cell walls stay where they were, and that is the whole reason freeze dried strawberries look like strawberries.
Why It Takes So Long
Sublimation is slow and gentle by nature, and the machine has to remove essentially all the water rather than most of it. Thicker layers, denser foods and anything sugary extend the run. A cycle is a day of your machine’s time, not an afternoon.
Preparing Food for the Trays
Cut everything to a similar thickness and spread it in a single layer with space around each piece. Thick or piled food is the most common reason a cycle finishes with a cold wet core in the middle, because the vapor has to travel out through everything above it.
Cook anything you would cook before eating. Utah State University Extension notes that bacteria can survive freeze drying and become active again when water is added back, and that foods requiring rehydration should have a kill step such as cooking. Freeze drying preserves, it does not sterilize.
Pre Freeze First
Put loaded trays in a regular freezer until the food is solid before they go in the machine. It shortens the cycle because the appliance does not have to do the initial freeze, and it gives a cleaner result on fruit, which otherwise slumps before it sets.
What Freeze Dries Well and What Does Not
Fruit, vegetables, cooked meals, eggs and pasteurized dairy are the strengths. High fat foods are the weakness. Utah State University Extension notes that fat does not freeze like water, which slows the process and increases the risk of spoilage, and recommends avoiding high fat foods where possible.
| Food | How it behaves | Prep that helps | Notes |
|---|---|---|---|
| Berries and sliced fruit | Excellent, keeps shape | Pre freeze, single layer | Sugary fruit runs longer |
| Cooked meals | Very good, rehydrates well | Cook first, spread thin | The main reason people buy in |
| Eggs | Good, blend before loading | Cook or use pasteurized | Rehydrated eggs need cooking |
| High fat items | Poor, slow and prone to rancidity | Trim fat, spread very thin | Extension advice is to avoid |
Pasteurized dairy is workable, and the same extension source suggests melting or blending high fat cheeses and spreading them thinly to reduce rancidity and dry evenly. Raw or unpasteurized dairy is a different matter, since it can carry Listeria, Salmonella or E. coli.
Checking Whether the Batch Is Really Dry
The machine’s timer is a suggestion, not a verdict. Take a piece from the thickest part of the middle tray, let it come to room temperature, and break it. A fully dry piece snaps or crumbles cleanly and feels the same temperature as the room.
Anything cool to the touch still contains ice. Cold spots are the classic sign of an incomplete cycle, and the fix is to run more dry time rather than to pack it and hope. A single damp piece will spoil an entire sealed bag.
The Test That Catches the Rest
Seal a small sample in a jar and leave it on the counter for a day. Condensation on the glass means moisture is still leaving the food, and the batch goes back in the machine. It costs you one jar and a day, and it saves whole batches.
Packaging, Which Is Half the Result
Freeze dried food is extremely hygroscopic, meaning it pulls water out of the air fast. Utah State University Extension describes mylar bags of 5 to 7 mil without clear plastic windows, paired with oxygen absorbers, as the best long term protection, and properly stored product staying stable for years.
Work quickly at this stage, because a batch left open on the counter starts taking on moisture immediately. Have bags, absorbers and the sealer ready before the machine finishes rather than after.

Sealing the Bag
An impulse sealer gives a consistent seam across the whole bag width, which a household iron does not. Squeeze out the loose air, drop the absorber in, seal, and label the bag with contents and date. See the mylar guide for thickness and sizing and the absorber guide for matching capacity to volume.

The Routine Around the Machine
Between cycles there is defrosting and draining, wiping the chamber, and checking the door gasket. If your machine has an oil pump there is oil changing and filtering as well, which is the maintenance task new owners most often underestimate.
Build the habit early. Most cycle failures owners report trace back to a gasket that was not seated, a drain valve left open, or tired pump oil, and all three are easier to prevent than to diagnose halfway through a day long run.
Can You Build a DIY Freeze Dryer?
Not in a way that gives you what the machine gives you. The chest freezer and vacuum pump builds that circulate online do remove some water by sublimation, and they have no controlled vacuum, no shelf heat and no secondary drying stage, so nothing tells you whether a batch is actually finished.
That last point is the one that decides storage. Food that looks freeze dried while still holding bound moisture will not keep on a shelf, and a home build gives you no reading to check it against. The cheap version that genuinely works is the freezer method for small amounts you plan to eat soon. Past that, the honest choices are a dehydrator for the foods that suit drying or a real machine, and our freeze dryer against dehydrator comparison works through which foods land where.
Frequently Asked Questions
How long does one cycle take? The best part of a day and often longer, depending on how thick the load is, how much sugar or fat the food contains, and how cold the room is. Plan around it rather than waiting for it, and pre freeze the trays to trim the front end.
Do I have to pre freeze the food first? You do not have to, since the machine can freeze the trays itself, but doing it in a regular freezer shortens the cycle and gives better results with fruit. Most experienced owners pre freeze as standard practice.
Is freeze dried food safe to eat straight from the bag? Only if it was safe to eat before it went in. The process does not kill bacteria, so anything that would normally be cooked still needs cooking after rehydration, exactly as extension guidance describes.
Can I use a chest freezer and a vacuum pump instead of a machine? Improvised setups exist, and they are unreliable at holding the vacuum and temperature the process needs. You cannot verify the result, which matters most for the foods people want a freeze dryer for in the first place.
Why did my batch come out cold and soft in the middle? Loaded too thick, or the cycle ended before the secondary drying finished. Return the trays for more dry time. Test from the middle of the thickest tray next time rather than from the edge, where food always finishes first.
The Bottom Line
Freeze drying at home is a simple routine wrapped around a long cycle: prepare food in even single layers, cook anything you would normally cook, pre freeze the trays, run the machine, then test a piece from the middle at room temperature before you believe the timer. Pack into thick mylar with oxygen absorbers straight away, because freeze dried food takes moisture back out of the air quickly. Read next: which machine size fits your household and how to bring the food back properly.