Last updated: August 23, 2026
It worked last fall. You pulled it out of the cupboard for the first big batch of the season, put a bag in, closed the lid, and the pump ran for a while and then just stopped, or ran and ran and never pulled the bag tight. Nothing about the machine looks different. Nothing you did was different either.
This is the most common FoodSaver complaint there is, and it is almost never a dead machine. The vast majority of these are foam gaskets that have compressed and hardened, a lid that is not latching flat, or debris in the vacuum channel. Work through the list below in order and do not buy anything until you have reached the part that costs money, because most people never get there.
This article contains affiliate links. If you buy through them, we may earn a commission at no extra cost to you. Learn more.
Quick Answer
Why is my FoodSaver not vacuuming?
- Gaskets first. FoodSaver support puts gasket condition and seating at the top of the list, and recommends replacing them yearly.
- Then the lid. Both latches have to close, and a raised drip tray keeps the lid from sitting flat.
- Then the bag. A smooth chamber pouch or a short tail will stall a cycle on a perfectly healthy machine.
- Then heat. A machine that just ran a dozen packs is in thermal protection, not broken.
Bottom line: four free checks fix most of these. Gaskets are the first thing worth spending on.
First, Rule Out the Bag
Before you touch the machine, try a fresh bag of known type. Smooth chamber pouches will not evacuate on a suction machine at all, because there is no channel for the air to travel through, and that failure looks exactly like a broken pump. So does a bag cut too short to sit properly across the strip.
Cut a new bag from a roll, leave a generous tail above the food, wipe the inside of the mouth dry, and lay it flat across the bar with both hands. If that seals, your machine was fine and your bags or your technique were the issue. The formats are explained in the bag guide.
The Free Checks, in Order
Run these in sequence and test a dry bag after each one. Skipping ahead is how people end up replacing a machine that needed five minutes of attention.
Check the Gaskets Are Seated and Clean
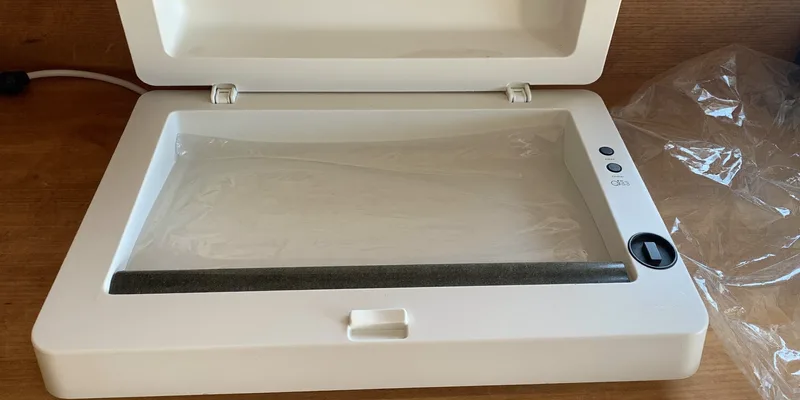
Open the lid and look at the foam strips, upper and lower. FoodSaver support says to verify they are correctly positioned and clear of debris, and to remove and clean them if there is any dirt. It also notes that if you compressed them during cleaning, you should wait a short while for them to expand again before testing.
Empty the Drip Tray and Check the Channel
A full or misseated drip tray stops the lid from closing flat, and a lid that does not close flat cannot hold a vacuum. Pull the tray, wash it, dry it, and reseat it. While it is out, look into the vacuum channel for crumbs, dried juice or a stray piece of film.
Close Both Latches, Firmly
On models with latches, both sides have to click. On lid press models, the pressure needs to be even across the whole lid rather than one hand on one corner. A single unlatched corner produces exactly the symptom of a failing pump.
Let It Cool
If the trouble started partway through a big session, the machine is protecting itself. Give it real cooling time with the lid open, keep the food cold in the meantime, and resume. A machine that does this every session is undersized for your workload, which is what the heavy duty guide is about.
Gaskets: the Part That Actually Wears Out
Foam gaskets compress every time you close the lid and lose their spring over years. When they stop recovering, the seal around the vacuum area leaks and the pump can never reach pressure. FoodSaver support recommends replacing them annually for machines that are having trouble holding a vacuum, which is a maintenance interval rather than a defect.
Replacement kits are sold for the common model families and typically include upper and lower foam strips plus heat strip tape. Check your model number against the kit listing, because the strips differ between generations and a near miss will not sit properly in the groove.

The Heat Strip and Its Cover
If the machine pulls a vacuum but the seam comes out patchy, brown or stuck to the bar, the problem is the sealing side rather than the pump. The heat element sits under a thin non stick cover, and that cover scorches and shreds with use, which is why repair kits include replacement tape.
Unplug the machine, let it cool completely, peel the old tape, clean the residue, and lay new tape flat with no wrinkles. A wrinkle in the cover puts a channel straight through your seal, and that is a slow leak you will not notice until the pack is frosted.

When It Really Is the Pump
Two signals. The motor makes no sound at all when the cycle starts, or it runs with a changed note and never builds pressure after new gaskets, a clean channel and a good bag. Liquid pulled into the machine is the usual history behind the second one.
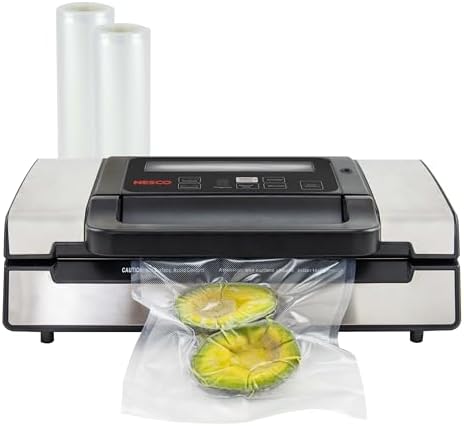
If broth or juice went in, unplug it, empty the tray, and leave it open somewhere warm and dry for a day or two before testing again, because moisture in the vacuum path is often reversible. If it still fails after that, replacement is usually the realistic answer, and the honest advice is to buy a machine sized to what you actually do. Nesco lists the VS-12 with dry, moist and double seal settings, a normal and gentle vacuum choice and a pulse function, which is a better fit than a bare bones model for anyone sealing wet food.
Symptoms and What They Point To
Match what you are seeing to the row, then work the free column before the paid one. Most rows resolve without an order.
| Symptom | Most likely cause | Free fix | If that fails |
|---|---|---|---|
| Pump runs, bag never tightens | Gasket leak or lid not flat | Reseat and clean gaskets, empty tray, latch both sides | Gasket replacement kit |
| Cycle stops early every time | Wrong bag type or short tail | Use embossed stock, leave more film | New roll stock |
| Seal is patchy or brown | Scorched heat strip cover | Clean the bar when cool | Replacement tape |
| Weak seals late in a session | Machine warm, gaskets not recovering | Rest it, work in smaller batches | A fan cooled machine |
| No sound at all | Power or pump failure | Try another outlet, check the cord | Replacement machine |
If the machine got wet during a soup session, read the liquid sealing guide as well, because the fix is a change in method rather than a part.
Frequently Asked Questions
How often should gaskets be replaced? FoodSaver support recommends annual replacement for machines that are struggling to hold a vacuum. In practice it depends on how much you use it, and hardened or cracked foam is the visible sign regardless of the calendar.
Can I clean the gaskets in the dishwasher? No. Wash them by hand in warm soapy water, rinse, and let them dry fully and regain their shape before reinstalling. Heat and pressure are what wore them out in the first place.
My machine seals but the pack loosens overnight. That is a seal line problem, not a vacuum problem. Moisture or fat in the seam is the usual cause. Wipe the bag mouth, run a second seal below the first, and check the film in the bag guide.
Is it worth repairing an older machine? If the fault is gaskets or heat strip tape, yes, because both are inexpensive parts. If the pump has failed, the parts and effort usually exceed the value of a household machine.
Does the accessory hose affect vacuum on bags? It can, if it is left connected or the port cover is not closed properly. Disconnect the hose and close the port before running a bag cycle.
The Bottom Line
Start with a fresh embossed bag and a long tail, then gaskets, then the drip tray and the latches, then a cooling break. That sequence resolves the great majority of FoodSaver machines that stop pulling a vacuum, and it costs nothing. Gaskets are the first part worth buying, since foam compresses with age and FoodSaver treats replacement as routine maintenance. Only after new gaskets, a clean channel and a known good bag has failed is the pump a fair suspect, and if liquid went in, dry the machine out fully before you write it off. Read next: why bags fail more often than machines and how to seal soup without wetting the pump.