Last updated: August 23, 2026
Most FoodSavers come out of the box in December, get used on a turkey carcass and half a bag of coffee beans, and then live in a cupboard until the next deer or the next sale on chuck roast. By then the manual is gone, the lid latch feels stiff, and the first bag of the season fails at the seam. None of that is the machine breaking. It is a set of small habits that the quick start card never really spells out.
This walkthrough covers the whole cycle, from cutting a bag off the roll to sealing a jar of dried beans, in the order you actually do it at the counter. Repairs and pumps that will not pull are a different subject, and we keep those in the FoodSaver troubleshooting guide.
This article contains affiliate links. If you buy through them, we may earn a commission at no extra cost to you. Learn more.
Quick Answer
How do you use a FoodSaver?
- Cut a bag from the roll, seal one end, then load the food. FoodSaver support tells owners to allow 3 inches of headspace so the bag can seal tightly.
- Set moist or dry. FoodSaver describes the moist setting as the one for foods that carry liquid or possible moisture, and dry for pantry goods, hard cheeses and dried fruit.
- Lay the open end flat in the channel, close the lid, latch it, and let the cycle run to the end.
- FoodSaver support says to wait at least 20 seconds between seals so the appliance can cool down.
Bottom line: most failed seals are a wet bag mouth, too little headspace, or a machine that was not given its cooling pause.
What the Machine Is Actually Doing
A FoodSaver is an external suction sealer. It grips the open mouth of a textured bag, draws air out through the channels in that texture, and then presses a heated wire against the plastic to weld it shut. Everything that goes wrong goes wrong at one of those two stages, either the pull or the weld.
That design is also why the bags are not interchangeable with any plastic on the shelf. Smooth bags have no channel for the air to travel along, so the machine seals a pocket of air instead of removing it. Our page on vacuum sealer bags covers embossed against smooth in detail.
Your First Bag, Step by Step
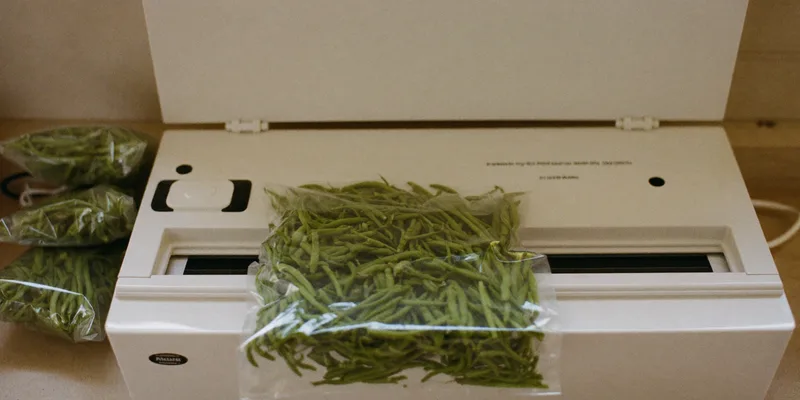
Start with the roll, not with the food. Pull enough material for the contents plus the headspace, cut it with the built in cutter, and seal one end using the seal only button. Load the food, keep the last few inches of the bag clean, then run the full vacuum and seal cycle with the open end flat in the channel.
Headspace and a Clean Bag Mouth
FoodSaver support tells owners to always allow 3 inches of headspace so the bag can seal tightly. Grease, brine or a stray crumb in that band is the most common cause of a seam that opens overnight, because the wire welds plastic to fat instead of plastic to plastic. Fold a cuff back over your hand while you load, then unfold it before sealing.
Let It Cool Between Bags
FoodSaver support also says to wait at least 20 seconds between seals for the appliance to cool down before sealing another item. On a big processing day that pause is the whole game, because a sealing wire that never cools produces thin, glossy seams that peel apart in the freezer. Line the bags up, load them all, then seal in a rhythm rather than racing.
Moist or Dry, and When It Matters
The setting changes how long the heat stays on. FoodSaver describes the moist setting as the one to use for foods that have liquids or possible moisture in the bag, and the dry setting for pantry goods, hard cheeses and dried fruits without moisture that could compromise the seal. Choosing wrong is why a marinated steak seals fine and a bag of flour scorches.
Genuinely liquid contents are a different problem. Soup and brine get pulled up the bag and into the machine long before the seal happens, which is why a freeze first step, or a chamber machine, is the real answer. We cover that split in the guide to sealing liquids.
Bags, Rolls and the Built In Cutter
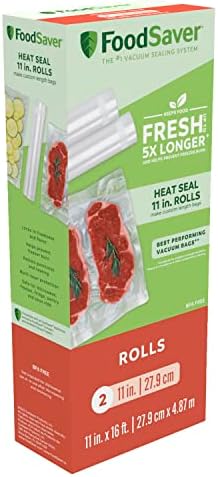
Rolls give you a custom bag length and cost less per seal, while precut bags save a step when you are portioning identical pieces. Most owners end up with both, a wide roll for roasts and a box of quart bags for weeknight portions. Whichever you use, the mouth needs to sit flat and unwrinkled across the channel.
If you are running low on roll stock
Jars, Canisters and the Accessory Port
The accessory hose turns the same pump into a jar sealer, which is the feature most owners forget they paid for. A jar sealer sits on a standard mason jar lid, the hose pulls the air out of the jar, and the lid stays down under its own vacuum. It is the fastest way to keep coffee, nuts and dried herbs from going stale.
What it is not is canning. A vacuum sealed jar of moist food at room temperature is not shelf stable, because vacuum removes air rather than heat processing the food, and the NCHFP is clear that low acid foods require a pressure canner. Keep jar sealing for dry goods, the refrigerator and the freezer, which is exactly the line we draw in jar sealing for dry goods.
If you want to seal mason jars with the hose

Which Button for Which Job
Four controls cover almost everything a home sealer does. Knowing which one to reach for saves bags, and it stops the machine from crushing everything you own into a puck.
| Control | What it does | Use it for | Watch out for |
|---|---|---|---|
| Vacuum and seal | Full cycle, pull then weld | Meat, portioned meals, blanched vegetables | Needs the 3 inch headspace FoodSaver specifies |
| Seal only | Welds without pulling air | Making a bag from a roll, resealing chip bags | Easy to press by accident mid cycle |
| Moist setting | Longer heat for damp seams | Marinated or juicy foods | Not a substitute for freezing liquids first |
| Pulse or accessory | Short bursts, or suction through the hose | Bread, berries, jars and canisters | Delicate items still crush if you hold it |
Button names differ between models, and the moist and dry descriptions above are the ones FoodSaver uses in its own support material. Check the label on your lid rather than assuming your machine matches a friend’s.
The Mistakes That Waste the Most Bags
Five habits account for most of the wasted plastic: sealing a wet bag mouth, filling to the top, sealing bag after bag without the cooling pause, using smooth bags with no air channels, and freezing sharp bones without padding. Each one produces a seal that looks fine on the counter and lets go in the freezer.
Two of them have simple fixes. Wrap bones in a paper towel or a fold of freezer paper before bagging, and freeze wet items on a tray for an hour before they go in the bag. Our roundup of vacuum sealing mistakes works through the rest, including the ones that quietly shorten freezer life.
Frequently Asked Questions
Why does my FoodSaver stop pulling partway through? The usual causes are a bag mouth that is not flat in the channel, moisture in the channel from the last bag, or a foam gasket that has flattened with age. Dry the channel, reposition the bag, and if a fresh bag on a clean channel still fails, work through the troubleshooting checklist before buying anything.
Can I reuse FoodSaver bags? Bags that held dry goods or whole cuts can be washed, dried thoroughly and cut down for a shorter bag. Bags that held raw meat, fish or anything oily should not be reused, because you cannot reliably clean the textured channels.
How much space should I leave at the top of the bag? FoodSaver support tells owners to allow 3 inches of headspace so the bag can seal tightly. Less than that and the contents get pulled into the sealing area, more than that just wastes roll.
Does vacuum sealing replace canning? No. Removing air is not heat processing, and shelf stable low acid food requires a pressure canner under NCHFP guidance. Vacuum sealed jars belong in the refrigerator, the freezer or the dry goods shelf. We lay the two side by side in vacuum sealing against canning.
Can I seal a bag of soup? Not directly with an external machine. Freeze the soup solid in a container first, then bag the block, or step up to a chamber machine that seals liquid without pulling it up the bag.
The Bottom Line
Using a FoodSaver well is four habits: keep 3 inches of headspace as FoodSaver instructs, keep the bag mouth clean and flat, match moist or dry to the food, and give the machine its cooling pause between seals. Do those and the bags last as long as the freezer does. If you are still choosing a machine, our vacuum sealer buying guide compares suction, seal width and duty cycle, and FoodSaver bags and rolls covers what to feed it. Owners shopping the entry model should read the FM2000 review first.